Reclaimed Health

Reclaim the Health You Were Meant to Enjoy

  • About Marla
    • Speaking
    • Events
  • Work With Me
    • Schedule a Consult
    • My Food Philosophy
    • What Is Functional Nutrition?
    • The MELT Method: Feel Better Now!
    • Classes
  • Contact
  • Appointments
  • Blog
  • Newsletter Subscribe
  • Resources
    • Order Supplements

Pudding for Breakfast? Yes, Please!

October 22, 2016 by Marla Leave a Comment

chia-pudding-header


Chia Seeds?

Cha-Cha-Cha Chia?  Like those planter thingies?

Really?

Yup.

The Humble Chia Seed

We’re all familiar with those terracotta planters that you spread with chia seeds which grow into “hair.” They’re very funny. But did you know those little chia seeds are nutrition powerhouses?

Chia seeds are high in fiber, omega-3 fats, protein, vitamins and minerals:

  • Dietary fiber (11g – 42% recommended daily value)
  • Protein (4.4g – 9% RDV)
  • Omega-3 fatty acids (4915 mg)
  • Omega-6 fatty acids (1620 mg)
  • Calcium (77 mg – 18% RDV)
  • Copper (0.1 mg – 3% RDV)
  • Phosphorus (265 mg – 27% RDV)
  • Potassium (44.8 mg – 1% RDV)
  • Zinc (1.0 mg – 7% RDV) (source)

Making the switch to a grain-free or Paleo-style diet can be challenging. We miss foods like oatmeal and breakfast cereal. Grains are also used as thickeners in sauces. Thankfully we have the humble chia seed!

Recipes for chia pudding (also called chia gel) abound. A quick internet search will bring up dozens of recipes. That just goes to show how very versatile this little seed is.

The most basic recipe for chia pudding is simply 5 parts liquid to 1 part chia seeds.

So you can use 2.5 cups of full-fat coconut milk (the kind in a BPA-free can) to 1/2 cup chia seeds.   Or for a smaller batch you could use 1.25 cups of almond milk to 1/4 cup chia seeds. Or just use plain water. Chia seeds have no flavor on their own and of course neither does water so you’ll want to use a little more spices and probably a pinch of sea salt or it will be quite bland.  You can use most any liquid:  water, nut milk, coconut milk, tea, etc. You’re only limited by your imagination!

Mmmmmm……what about chai tea chia pudding with some toasted coconut? Just be sure to let the tea cool to room temperature before adding the chia seeds.

Top like you would oatmeal. You can used berries, fruit, nuts, toasted coconut, flax seeds, pumpkin seeds, etc.  Add spices like cinnamon or pumpkin pie spice, vanilla or almond extract.  How about a splash of vanilla and a little coco for a yummy chocolate pudding?

Use your imagination! Then post your creations below. I’d love to hear what you come up with!

marla


Print
Chia Gel: A Better Breakfast!
Prep Time
5 mins
Cook Time
2 hrs
Total Time
2 hrs 5 mins
 
Chia gel is high is omega-3's and fiber. It makes a satisfying breakfast in place of oatmeal. Top it with your favorite oatmeal toppings like nuts, seeds, cinnamon or honey.
Course: Breakfast
Cuisine: Vegan
Servings: 4 servings
Calories: 138 kcal
Author: Marla Evans @ ReclaimedHealth.com
Ingredients
  • 1/2 cup chia seeds
  • 1 can coconut milk 13.5 oz
  • Water to make a total of 2 1/2 cups of liquid Or use 2 1/2 cups non-dairy milk
  • Pinch of sea salt
  • Toppings of your choice
Instructions
  1. Put coconut milk, water, and salt in a jar and shake until well blended
  2. Add chia seeds and shake or stir
  3. Shake or stir frequently for the first 5 minutes or so. As the seeds begin to absorb the liquid they will swell and stick together. Shaking or stirring prevents this
  4. Allow to sit in the refrigerator for several hours or overnight. The seeds will continue to swell and form a gel.
  5. When ready to serve top with your favorite oatmeal toppings
Recipe Notes

Suggested Variations:
Strawberries, blueberries with toasted coconut
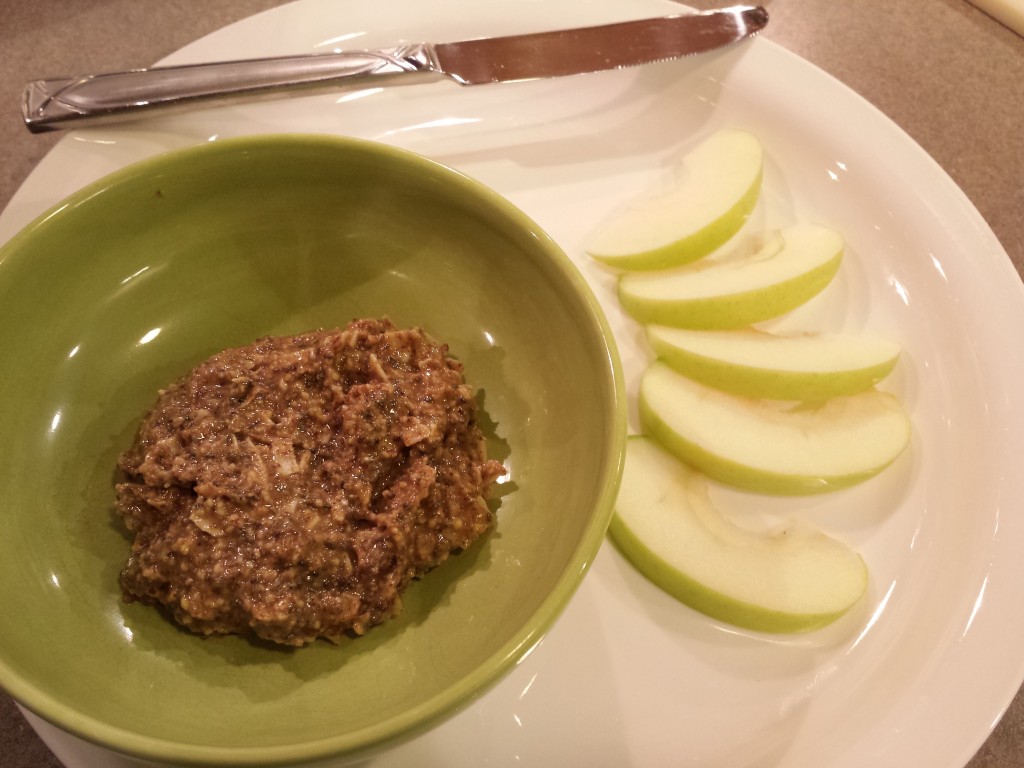
Green apple & cinnamon with pecans
Walnuts, pumpkin seeds and pumpkin pie spice
Blueberries and cardamom with pumpkin seeds
1/4 cup pumpkin puree, pumpkin pie spice, cashews
Spoonful of coco, splash of vanilla and a little liquid stevia or honey

If the tapioca texture of chia gel bothers you, put the seeds and liquid in a blender and blend until smooth. You'll end up with a pudding texture instead.

**Nutrition information for 1/4 recipe of chia gel made with water and no toppings. Other liquids and toppings will alter the nutrition content


Save

Save

Save

Save

Save

Save

Filed Under: Breakfast, Recipes, Vegan Tagged With: breakfast, chia seeds, omega-3, vegan

Why a Functional Nutritionist?

October 22, 2016 by Marla Leave a Comment

What is Functional Nutrition?  

A leading-edge, evidence-based approach to health that focuses on identifying root causes and system imbalances to significantly improve patient health outcomes.  

Sound complicated?  Let’s simplify it.

A functional nutritionist looks at the whole person to discover the underlying root causes of symptoms.   A functional nutritionist emphasizes real food, nutrient density AND food quality, as well as how that food promotes health.  The role of a functional nutritionist is to focus on building health while helping to restore the body’s proper function and balance.

“Just how can a functional nutritionist help me?”

Woman

That question holds so much frustration and pain.  Maybe you’re suffering from exhaustion, brain fog, blood sugar issues, chronic digestive issues, food sensitivities, or hormone imbalance.  Yet despite all the doctors, despite all the miracle products and empty promises of super cures, you have not found relief.  After all this time you’re on information overload and don’t know who you can trust.  How can you know what information is true and what’s just snake oil?  And more importantly, who can you trust to translate the information into sizeable bites that truly apply to your situation?

Here’s the good news!  Your search has led you to me, Marla Evans, founder of Reclaimed Health.  My story may be similar to yours.

image00

My Story

What started in my late 20s as muscle tightness became, by my mid-30s, extreme fatigue and a host of other health concerns. At my worst I could barely even shower in the morning. I knew that I needed to take major steps to reclaim my health, but didn’t know where to turn. All the doctors did was prescribe medications that simply made my symptoms worse and all those “super juices” and supplements did nothing for me.

A misdiagnosis of rheumatoid arthritis, with all the accompanying medications, propelled me into the world of natural health.  I intuitively knew there was a way to control my symptoms with food and lifestyle changes.

As I began this journey, I investigated everything from Paleo to Weston A. Price to Raw Vegan.  My research taught me how to clean up my diet and I started feeling better!  I switched to non-toxic cosmetics, personal care products, cleaners and laundry detergents.  I continued to improve.

MarlaSleuth

And through this whole process, I also found that I had developed an abiding passion for teaching others and helping them find change.

I lost over 15 years of life to my poor health – I don’t want you to do the same.

I continued deepening my knowledge of the interaction between body and food by attending the Nutrition Therapy Institute and obtained my Master Nutrition Therapist designation.

I haven’t limited myself to Google searches and guesses. I have invested in working with experts, professionals, and attending in-depth educational programs so that I can bring you the best practices and most current knowledge in the field.

As a result of my training and my journey, I am able to guide you out of information overload, help you find answers, and help you develop an action plan geared to your individual needs.

image00

How Can a Functional Nutritionist Help Me?

Let’s take a look at a few symptoms you may be experiencing and how, through Functional Nutrition, I can help.

Symptom #1:  Fatigue/Low Energy

Fatigue has many causes:

  • Stress or lifestyle choices
  • Dietary issues such as food sensitivities or nutrient deficiencies
  • Blood sugar imbalance
  • Hormone imbalances
  • Toxin overload
  • Or all of the above!

I take the time to do a thorough health history, lifestyle evaluation and diet analysis. This allows us to unravel the complexity of your fatigue so you can reclaim the energized body you were meant to enjoy!

Fatigue & Brain Fog got you down?
Register for
the Total Energy Upgrade!

SYMPTOM #2:  Digestive Problems – gas, bloating, GERD, reflux, heartburn, IBS, Celiac

  • Leaky gut is associated with all these digestive issues
  • A well-functioning digestive system is the cornerstone of good health
  • The “gut” is actually called our second brain; the intestinal nervous system is wired directly back to the brain
  • Poor gut function can lead to autoimmune conditions such as MS, RA, Celiac, Hashimoto’s, and other autoimmune diseases.
  • Skin issues such as eczema and psoriasis are also directly connected to the gut
  • Seasonal allergies are connected to gut health
  • Diet and toxins can cause a disruption in the neurotransmissions causing your health to suffer
  • Medical and nutritional experts agree that good nutrition is directly related to good digestive health

If you are concerned about your digestive health or are suffering from poor digestion, my gut repair program may be your answer! While my philosophy is to focus on food as medicine, there are times when the body needs more help and supplements are necessary. My gut repair program includes diet and lifestyle modifications along with a supplement routine proven to repair the gut.

SYMPTOM #3:   Food Sensitivities and Intolerances

  • Food intolerances can contribute to neurological, autoimmune and digestive disorders as well as pain and inflammation
  • Food intolerances are directly related leaky gut
  • A food intolerance can often arise after the digestive tract has been compromised due to poor diet, stress, or imbalanced gut bacteria

Food sensitivities are not the same as food allergies.  Food allergies are potentially deadly while sensitivities are not.  However, food sensitivities are still serious.  They indicate a poorly functioning gut and create inflammation in the body. Inflammation damages tissues leading to symptoms such as muscle or joint pain, headaches, stuffy nose, and brain fog or trouble concentrating.

Identifying food sensitivities and intolerances can be tricky.  I can perform lab tests and/or design an elimination diet to identify the foods your body is reacting to. We then work on healing the gut to eliminate food sensitivities.

SYMPTOM #4:  Hormones!  Not Just for Women!  – Minimize Symptoms during Peri-menopause or Andropause (male menopause)

  • Hormones are critical to the function of virtually every system in the body
  • Our hormones are intricately connected. When one is too high it causes another to be too low
  • Hormones are balanced through a combination of diet and lifestyle adjustments

A person who is experiencing “brain fog”, slow metabolism, moodiness, willpower or motivation issues can find a solution!  I can run lab tests to determine hormone imbalances then get to work identifying the root cause –  whether it be blood sugar, the adrenal glands, or the GI tract –  and design a diet and lifestyle program that works for your body.

Want help navigating the crazy world of hormones?
Schedule an
appointment with me

SYMPTOM #5:  Nutrient Deficiencies

  • The immune system is dependent upon a variety of nutrients
  • Infection and lack of nutrients are often linked together
  • Certain foods may help reduce the risk of certain diseases

Nutrient deficiencies prevent the body from functioning at its best and can lead to a host of health issues. Nutrient deficiencies can even turn on genes that predispose us to disease. Through lab tests and diet analysis I can identify nutrient deficiencies, determine the cause of the deficiencies (poor diet, poor digestion, stress, etc.), and design a diet and lifestyle plan to replace the missing nutrients.

SYMPTOM # 6:  Medication, Medication, Medication, but I still have the Same Problem.

  • Medications treat symptoms and temporarily make us feel better
  • Medications DO NOT treat the underlying problem so the symptoms keep getting worse
  • High blood pressure, type II diabetes, high cholesterol, thyroid issues, and more, are all symptoms of larger underlying issues

If you’re tired of all the meds and want to reduce or eliminate them, I can work with you and your doctor to design a diet and lifestyle plan to reach your goal. Only your doctor can alter your medications, but I can help restore your body’s balance which in turn improves function and reduces the need for medications

If you are one of the fortunate few and none of the above symptoms apply to you, Congratulations!  But you still want to eat healthy, learn more about the value of certain nutrients, and shop smarter.  Again, you are overwhelmed by the amount of information available and have little or no idea where to start.  The answer is right here!

FOOD PREP AND NAVIGATING THE GROCERY STORE

  • Select recipes with key nutrients and proven results
  • Shop with a trained expert – learn to read labels, determine “low fat” from “good fat”, and the importance of quality food
  • Prepare meals in your own kitchen and learn new prep and storage methods

Reclaiming your Health is all about becoming informed and making good choices.  In the constantly changing sea of information, I can provide information that is specific to your needs, apply that information in a manner that will treat your whole person, and help you make choices that will lead to long-term GREAT health.


http://www.nutritionist-resource.org.uk/articles/tiredness.html

http://clinical.diabetesjournals.org/content/28/1/12

1990 l\/l0Collum Award Lecture. Nutrition and immunity: lessons from the past and new insights into the future

http://ajcn.nutrition.org/content/71/6/1660s.short


Save

Save

Save

Save

Filed Under: Blood Sugar, health issues, Hormones, Stress

Laughter, Stress and Candy Bars – Say What?

September 8, 2016 by Marla Leave a Comment

Friends on my personal Facebook page have seen me posting “giggles” posts several times a day. I post funny videos, corny jokes, whatever makes me laugh. Why do something so “pointless?” All it does is clog up people’s news feed with “useless” stuff.

Well, I started it after my own Facebook feed grew so very negative. There were posts about police shootings, corrupt political candidates, race wars, religious wars, natural disasters and more. It seemed that the world had gone mad and all the joy had been sucked out of life. I found my stress level growing worse and worse and my world growing increasingly dark.

So I decided to do something about it.

I started reposting things that made me laugh.

Why do this?  Because I understand how damaging stress is on the body and I understand the power of laughter. I wanted to help brighten my friends’ day and lower their stress level even if it was just for a moment.


Why Is Laughter So Important?

Laughter Stress and Candy Bars

“A cheerful heart does good like medicine,
but a broken spirit makes one sick.”

Proverbs 17:22 The Living Bible


Laughter has several healing qualities. For example, research has shown laughter can relieve stress by:

  • Increasing oxygen intake which stimulates organs and increases endorphin production
  • Activating the parasympathetic nervous system (the calming side of the nervous system)
  • Stimulating circulation and aids muscle relaxation
  • Boosting the immune system
  • Relieving pain
  • Improving mood[i]

With all laughter has to offer, why would you NOT want to laugh?


The Consequences Of Chronic Stress

stressedWhy should we be concerned about stress? What’s so terrible about it? Sure it can cause anxiety sometimes (like if you have a terrible job) or a poor night’s sleep, but is it really so bad for your health?

In a word, yes!

Chronic stress negatively impacts every single area of the body. Just a few examples include increased incidents of:

  • Cardiovascular disease
  • Anxiety
  • Frequent colds
  • Memory loss
  • Hypertension
  • Sexual dysfunction
  • Insomnia
  • Fatigue
  • Depression
  • Infertility
  • Irregular menstrual cycles
  • Difficulty concentrating
  • Digestive problems[ii]

Let’s take a look at how the stress response relates to an all-too-common problem, blood sugar management.


The Candy Bar Effect of Stress

You’ve heard of the stress hormone called cortisol. You probably relate it to excess belly fat since people with chronically elevated cortisol levels often have excess fat around their middle.  Cortisol is released in response to stress whether emotional stress (a bad job or poor relationship), physical stress (illness or injury), or mental stress (worry or reliving past stressful experiences).

cortisolreleaseOne of cortisol’s jobs is to stimulate the release of stored sugar, called glycogen, providing muscles with the fuel they need to escape the threat or turn and fight it. Often referred to as the “fight or flight” response, this mechanism was very handy back in cave man days when we had to escape sabretooth tigers.

Trouble is, in our modern sedentary society we don’t go out and fight that tiger. We sit at our desk all keyed up and angry over an unpleasant interaction with our boss. Cortisol has released a shot of sugar into our blood stream, but we don’t use it up by exercising. As a result, our blood sugar rises.


That’s how stress can have the same effect on the body
as eating a candy bar, but without the joy of the treat.


This is one reason why diabetics can have trouble controlling their blood sugar. There’s a stress in their life that is triggering cortisol which raises their blood sugar.

But you don’t have to be diabetic to have blood sugar trouble.


The Blood Sugar Continuum

bloodsugarspectrum

There’s a whole continuum of blood sugar dysregulation that ends with Type 2 Diabetes. Symptoms occur anywhere along that spectrum. The scary part is 46% of the American population is either diabetic or pre-diabetic. Many people don’t know they’re pre-diabetic!

Signs of blood sugar issues include:

  • craving sweets
  • afternoon sleepiness
  • fatigue after meals
  • hungry soon after eating (even after eating a big meal)
  • lightheaded or moody if meals are missed
  • blurred vision
  • difficulty losing weight despite regular exercise


forgetfogflabfatigue

I often refer to blood sugar symptoms by the three biggest culprits: Fog, Flab and Fatigue.

  • Brain Fog: the inability to think straight, concentrate, or remember things
  • Belly Fat: or extra flab, especially around the middle
  • Fatigue: despite a good night’s sleep

These blood sugar disorders can result in some pretty unpleasant consequences:

  • Decreased thyroid production (low metabolism, weight gain, hair loss)
  • Increased risk of cancer
  • High blood pressure (increased cardiac risk)
  • Systemic inflammation (This is a biggie! More on that in another post)
  • Increased risk of Alzheimer’s (researchers are beginning to call Alzheimer’s Type 3 Diabetes)

“We conclude that the term “type 3 diabetes” accurately reflects the fact that AD [Alzheimer’s disease] represents a form of diabetes that selectively involves the brain and has molecular and biochemical features that overlap with both type 1 diabetes mellitus and T2DM [type 2 diabetes melitus].”[iii]

Are you at risk for blood sugar problems?
Take the Quiz and find out!

I hope you can see that managing both stress and blood sugar can go a long way toward maintaining your health. I’ve only just touched on them in this post. Stress and blood sugar are each easily whole volumes on their own and I’ll be discussing them in greater detail in upcoming posts.

For now, keep your blood sugar under control by managing stress whether the source be physical, mental or emotional.


Solutions

Stress Management:

Mental/emotional stress: explore Splankna therapy, Heart Math, prayer and meditation, and time out in nature

Physical stress:  consider if you may be under or OVER exercising, possible hidden infections (viral, bacterial, parasitic, SIBO or other gut dysbiosis), nutrient deficiencies, poor gut function, poor diet.

These hidden physical stresses can be very tricky to track down. A functional health practitioner can help. you find them more quickly

Diet:

Developing a personalized menu that keeps your blood sugar at optimal levels is vitally important to blood sugar management! You can do this yourself by using a glucometer (blood sugar meter) to test your glucose and aim to keep it below 115 after meals. After a while you’ll have a collection of meals you know work for your body.

I cover this and much more in my blood sugar class, Total Energy Upgrade and also in private nutrition coaching sessions.  Sign up for my newsletter and follow me on Facebook to be notified the next time I run the class.


References:

[i] http://www.mayoclinic.org/healthy-lifestyle/stress-management/in-depth/stress-relief/art-20044456

[ii] http://articles.mercola.com/sites/articles/archive/2015/12/17/stress-makes-you-sick.aspx

[iii] http://www.ncbi.nlm.nih.gov/pmc/articles/PMC2769828/

Save

Save

Save

Save

Save

Save

Save

Save

Save

Save

Save

Save

Save

Save

Filed Under: Blood Sugar, health issues, Stress

My new favorite toy – the FitDesk!

January 7, 2016 by Marla Leave a Comment

DRAFT

FitDesk
FitDesk makes exercise so easy!

Between school, work and building a new business, I spend WAY too much time on the computer! I happened to catch the FitDesk on an Amazon Deal of the Day and since I had enough points from my Amazon credit card (which, btw, is paid in full every month – no debt for me!) I decided to treat myself to a new desk.

A full review is coming shortly, but for now just know I really like this desk!

Check out the FitDesk here: http://amzn.to/1Rvx7H4 (affiliate link)

Filed Under: Uncategorized

Fire Cider

January 4, 2016 by Marla Leave a Comment

My own version of Fire Cider is coming soon. In the meantime go straight to the source, Rosemary Gladstar over at Mountain Rose Herbs for her Fire Cider recipe.

Filed Under: Herbal Remedies

Grocery Store Tours

January 4, 2016 by Marla Leave a Comment

Grocery store tours with Marla Evans
Reading labels is so confusing! Let me help!

Navigating the grocery store can be worse than an electronics store on Black Friday! So many labels with so much confusing, often conflicting, information. “Low Fat,” “All Natural,” “Lowers Cholesterol” and all those other spectacular claims on the front of the product are confusing enough, but then you look at the ingredient list! What in the world does all that stuff mean?? You can’t even pronounce most of it. How do you know which product to buy?


Let me help!

I’m happy to go with you to your favorite grocery store and help you navigate all those choices. You’ll leave with a list of “Good, Better, Best” products and can choose what best fits your budget.

My standard fee of $60 applies, but I do not charge any travel fees within the Amarillo/Canyon area. Outside that area, contact me to discuss your shopping trip.

Have a group of friends who would like to join us? I’m happy to have up to 5 people in the group. I charge an additional 25% ($15) per person. You’re welcome to split the total cost among your friends.

Contact Me today to schedule your tour!

Filed Under: Classes

Dinner’s In The Freezer!

January 4, 2016 by Marla Leave a Comment

Freezer Prep Class
No more wondering what’s for dinner! Just look in the freezer

This class is held in your kitchen. I’ll provide you with a list of recipes from which you choose 4 you’d like me to prepare for you.

I’ll spend about 90 minutes showing you how to prepare the recipes. During this time you’ll learn about selecting ingredients, tips for easy prep, storage ideas and anything else that happens to come to mind! When we’re done you’ll have 20-24 servings prepped for you and ready to go in your freezer. You’ll also receive all the recipes, plus a handout with helpful tips & tricks.

You’re welcome to invite up to 6 friends to join us. They’ll receive the same handouts & tips.

Investment:

The cost of the class is $150 plus the cost of food (around $75-90). You’re welcome to invite up to 6 friends to join us for an additional fee of $25 each (no additional cost for family members living in your home). The host collects fees from any additional guests and is responsible for full payment.

You are welcome to divide the total cost among your friends however you like. Maybe you have 3 additional couples join you and they each take home one recipe. You could then divide the total cost evenly among the 4 families. Or maybe they just come for the education and you keep the food. In that case you would only ask $25 from each.

Contact me and Lets Get Cooking!

Filed Under: Classes

Total Energy Upgrade!

January 4, 2016 by Marla 1 Comment

Insulin Resistance Reboot Class
Brain Fog, Fatigue, Burnout

Total Energy Upgrade is designed for those who have had long-term concerns with the way that their body responds to food.

Insulin Resistance is a common condition affecting millions of people. Some symptoms that you might have a blood sugar imbalance include:

  • Fatigue
  • Brain fog
  • Feeling agitated, jittery, moody with almost immediate relief once you’ve eaten
  • Feeling hungry, especially for sweets, after eating a full meal
  • Intestinal bloating
  • Sleepiness after eating, particularly a high-carbohydrate meal
  • Belly fat
  • Increased or high triglycerides
  • Increased blood pressure
  • High total and LDL cholesterol levels
  • Low HDL cholesterol

Long term, insulin resistance can lead to heart attack, stroke, type 2 diabetes, and high cholesterol, chronic inflammation, and so much more. But there is hope!

In this program, I will provide you with

  1. Training & Education – I’ll give you a step-by-step plan to follow, and help you learn enough about your body and nutrition so that you can customize the plan for your own unique self.
  2. Tools – I’ll give you tools, recipes, planners, strategies – I’ll make sure that you are equipped to take this journey and succeed.
  3. Support & Accountability – With support, love, and guidance every step of the way, you will be able to stay on track and see the results that you need. I will partner with you so that you can Reclaim Your Health!

Whether you are concerned about your blood sugar, wish to decrease belly fat, eliminate brain fog … call me! I would love to help you address this.

If you have several friends with similar interest in this area, contact me and I am happy to provide a private small group class. Otherwise, let me know of your interest and please sign up for my newsletter to be notified when the next class is scheduled.

Save

Save

Filed Under: Classes

Detox for Health

January 4, 2016 by Marla Leave a Comment

Boost Your Health!
Boost Your Health!

Feel like your health needs an overhaul? Concerned about your reliance on sugar or caffeine to get through the day?

Toxins are substances that have irritating and/or harmful effects on the body. We are exposed to toxins every day in myriad ways. Even small exposures can build up over time, accumulating in our fat cells, liver and lymph nodes.

Symptoms that may indicate an increased toxic load:

  • Rashes
  • Fatigue, brain fog
  • Digestive problems
  • Aching muscles and joints
  • Headaches
  • Weight gain

In this class I will help you to eliminate toxins in your body and reduce inflammation.

Your kidneys, liver, lymphatic system, lungs, intestines, and even skin are working every day to neutralize toxins but in our modern world that is often not enough. In support of your body’s natural detox pathways, this program includes:

  1. Dietary change to clear the body
  2. Lifestyle adjustment – encompassing both exercise and rest
  3. Homeopathic remedies to stimulate your body’s detox system

And you will see results! You can’t see a cleaner liver, but you can feel improved energy, less reliance on sugar, rebooted metabolism and Reclaimed Health!

If you and several friends have a common concern about the level of toxicity and inflammation in your bodies and want to take this class together, please contact me and I will happily set up a private class for you. Otherwise, let me know of your interest and please sign up for my newsletter to be notified the next time that a class is scheduled.


Save

Filed Under: Classes

Soothing Sore Throat Remedy and Immune Booster

December 3, 2013 by Marla Leave a Comment

I found a lovely honey-onion syrup recipe from Rosemary Gladstar’s book, Medicinal Herbs (affiliate link). I made it last cold & flu season and found it quite tasty and helpful so I decided to make it again this year. However, naturally, I can’t leave a recipe alone so here is my version of this old-fashioned sore throat remedy.

I’m glad I had this on hand! I took the fur kids to the park this afternoon and our lovely West Texas wind was blowing in a strong cold front. The wind got my throat and ears hurting so I’m sipping on some Yogi Throat Comfort tea with a spoonful of this syrup – yes, onions and all.

Onions, garlic and raw honey are all strongly anti-microbial. Ginger is warm and soothing.  Together they make a wonderful syrup for colds or sore throats. Take 1/2 – 1 teaspoon every hour or 2 when you feel a cold coming on. Or if you already have a cold take 1 teaspoon 3-4 times daily to help speed your recovery.

Obviously this is not a low-glycemic recipe! If you’re watching your blood sugar, try Fire Cider instead.

Print
Soothing Sore Throat Remedy and Immune Booster
Soothing honey, warming ginger, and strong medicinal herbs onion and garlic combine to make a wonderful syrup to keep on hand during cold & flu season
Course: Herbal Remedies
Cuisine: Traditional Foods
Author: Marla Evans @ ReclaimedHealth.com
Ingredients
  • 1/2 white onion cut into thin slices
  • Thumb-size piece of fresh ginger chopped
  • 3-4 cloves of garlic chopped
  • 1 cup raw honey raw honey retains all the beneficial enzymes and healing properties
Instructions
  1. All ingredient amounts are approximate. Adjust to your liking. If you really like ginger, add more. If garlic is your thing than go for it!
  2. Slice onion, ginger and garlic and place in a small pan. Add just enough honey to cover. You might need a cup, maybe more or maybe less.
  3. Turn your oven on for 3-4 minutes, just enough to warm it up. Turn off the oven and place the pan inside with the oven light on to keep it warm. My oven will stay around 100 degrees this way. Leave the pan there for 24 hours or more. This allows the honey to gently draw out all the healing goodness from the plants.
  4. Alternatively, you can place the pan on the stove over the lowest setting. Be careful not to heat it too much so you don't destroy the enzymes in the raw foods. Cook gently until the onions are soft and the honey tastes of onion/ginger/garlic.
  5. Remove the syrup from the pan and store in the refrigerator. Don't even think about straining out the plants! That would be a horribly sticky mess you'll not soon repeat! Just use plants and all.
  6. Take 1/2 - 1 teaspoon every hour or 2 when you feel a cold coming on. Or if you already have a cold take 1 teaspoon 3-4 times daily to help speed your recovery.


Save

Filed Under: Herbal Remedies

The World’s Ugliest Fruit Dip!

November 7, 2013 by Marla Leave a Comment

World's Ugliest Fruit Dip
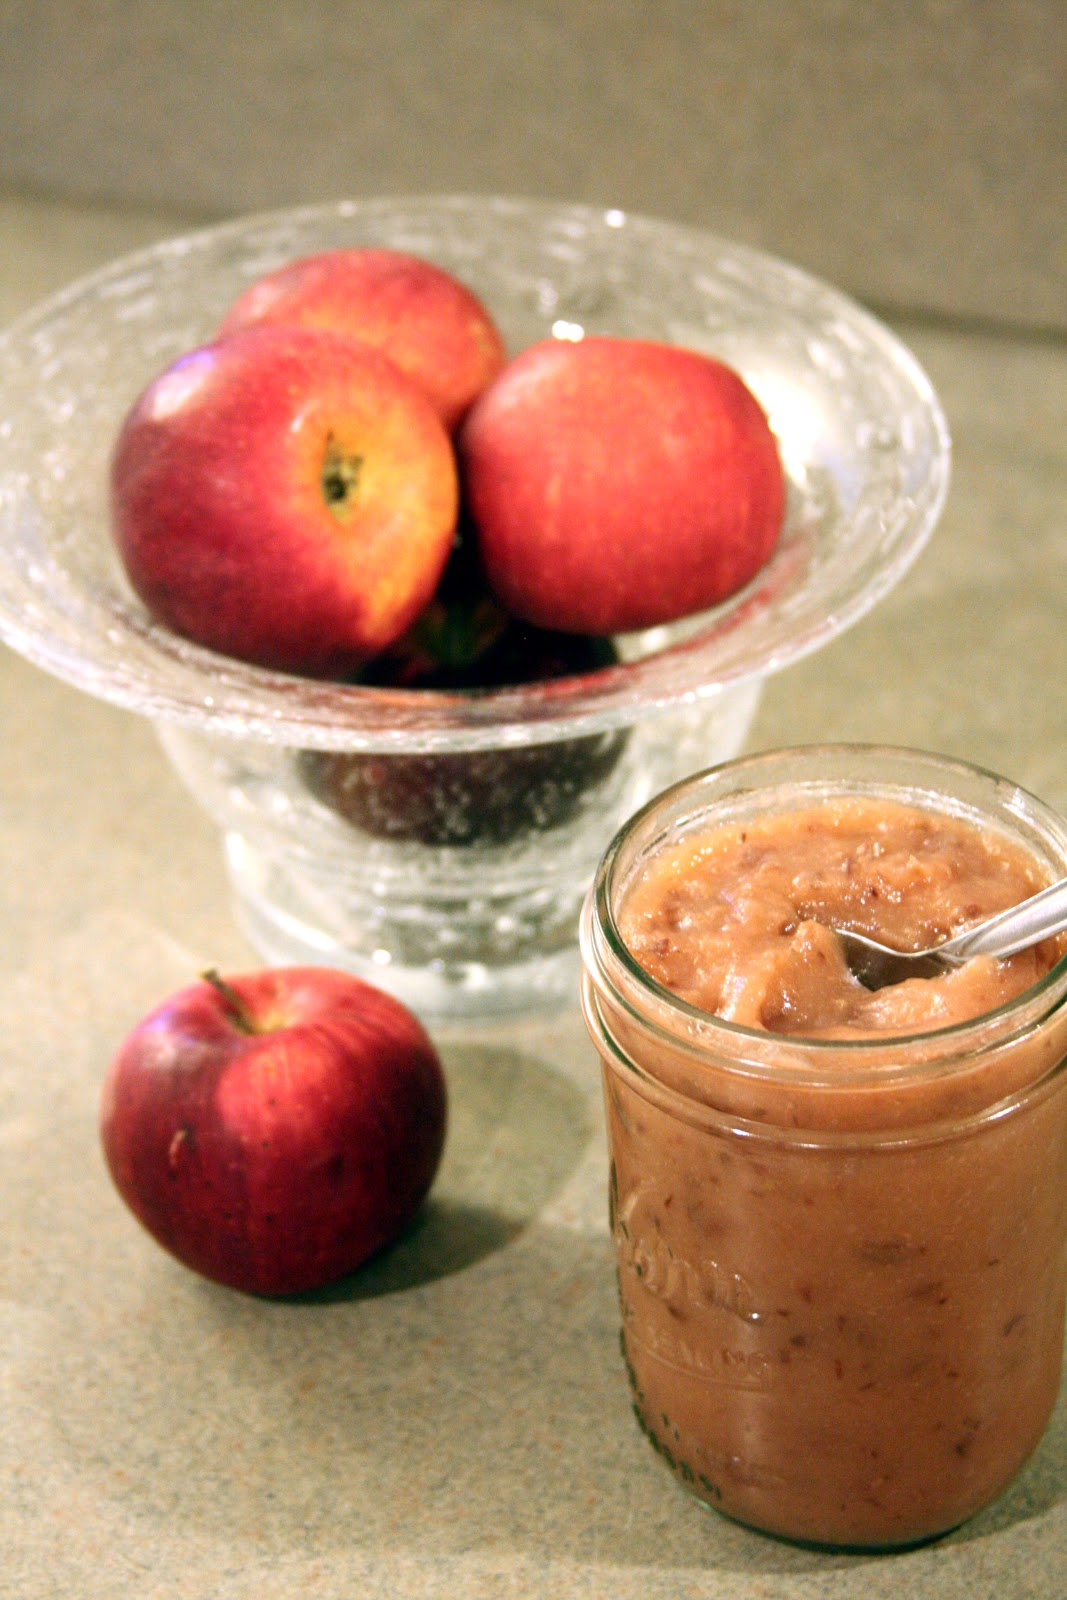
This must truly be the Ugliest Fruit Dip EVER! But it tastes so good and it’s so good for you! Yes, it’s high in fat so you don’t want to overdo it. But these are healthy fats! These are the kinds of real, whole food fats your body and brain need to function optimally.

Almond Butter & Chia Seed

This dip or spread starts with a base of almond butter, adds Chia seeds and coconut to balance the Omega-6’s in the almond butter, maple syrup (use the real stuff!) for minerals and olive oil for some more healthy fat.

Here’s how you make it, and no, I don’t measure this one. It’s too simple. Just play around with the amounts until you get a mix you like.

Try to find an almond butter without added sugar, just plain ground almonds and maybe some salt. I find fresh ground almond butter at Natural Grocers.


Ugliest Dip Apple Sandwich
Print
The World's Ugliest Fruit Dip!
Spread on slices of Granny Smith apples (low in sugar) for a VERY filling snack. That's all I had for dinner tonight and it filled me up very well. If you eat grains, this would make a good sandwich filling, or spread on toast. How about on celery or bananas? That would be tasty too!
Author: Marla Evans @ ReclaimedHealth.com
Ingredients
  • 1 Soup spoon full of unsweetened almond butter
  • Pinch of salt if your almond butter doesn't contain salt
  • Drizzle of maple syrup
  • Drizzle of olive oil
  • Big pinch of shredded coconut
  • 1 Soup spoon full of chia seeds
Instructions
  1. All amounts are approximate. Adjust to your taste. Add more or less maple syrup to your desired sweetness level. Add a little more olive oil if it's too thick. There's something about maple syrup that makes almond butter seize up and get dry and crumbly and the olive oil helps.
  2. Mix almond butter, salt, maple syrup and olive oil until well blended
  3. Add coconut and chia seeds and mix well
  4. Enjoy!


Ugliest Dip Revealed!


Filed Under: Recipes

Yummy Medicine!

October 30, 2013 by Marla Leave a Comment


The two youngest granddaughters are at our house today. They’re both sick. The 4 year old is recovering from strep and a possible tummy bug (or it could be due to the antibiotics…I know how much they upset my stomach). The 7 year old has a low grade fever and is complaining of headaches. Both are rather lethargic.

Mommy dropped them off last night so they wouldn’t have to get up early when she left for work. Naturally they woke up at 4am….They went back to sleep after a drink of water, but did Grandmar (Grandma Marla)? OH NO! I’ve been up ever since…sigh.

Along with favorite jammies, blankies and cuddle dolls, Mommy left a whole pharmacy worth of drugs for all their ailments, both over the counter and prescription. Thankfully they haven’t needed any so far (other than the antibiotic). But they know it’s up on the counter so every time they happen by it they beg and beg to have some medicine.

That got me to thinking. Our mothers and grandmothers used to have to either hold us down and force medicine down us or resort to hiding it in something to get us to take it (Just a spoonful of sugar helps the medicine go down! The medicine go dow-own, medicine go down)

I clearly remember my mother trying everything she could think of to hide the taste of penicillin one time when I was sick. It was SO bitter! We finally managed to hide it in strong chocolate milk. I was able to get it down, but it still tasted yucky.

But now Big Pharm has formulated medicines to taste just like candy! At first glance that seems like a good thing. No longer do overwhelmed, exhausted parents have to struggle, argue, conjole, threaten or plead to get their kids to take medicine. The kids BEG for it! 

A parent’s dream come true!!

Or is it…..

Take a quick look at any popular magazine. They’re filled with drug ads. Count how many drug ads you see just during one TV program. There are a LOT. And have you walked down the tummy trouble isle at the pharmacy???

We are bombarded by drugs. Drugs for cough, drugs for sniffles, drugs for scrapes, drugs to sleep, drugs to wake up, drugs for things we didn’t even know were wrong with us!

We as a society have become so dependent on drugs. We run to them at the slightest hint of discomfort. Our poor immune system has forgotten how to do its job!

And now the drug companies have formulated medicine so that it’s extremely attractive to kids, thereby teaching them to depend even more on medicine.

Now, certainly there are times when drugs are genuinely necessary! Don’t misunderstand me there. But do you really need Tylenol for that headache? Have you eaten today? Maybe you’re just hungry. Maybe you didn’t get enough sleep and a 15 minute power nap is all you need.

Maybe it’s time for the pendulum to swing back the other way a little bit to help teach our children that medicine isn’t a special treat, it’s only for when you REALLY need it. There are plenty of natural remedies our parents, grandparents, and great-grandparents used with great success. Maybe it’s time to start rediscovering them. 

Let’s start teaching our children this important lesson! Let’s start mixing yummy medicine with something not so yummy like….I don’t know….SARDINES?? 

EEWWWWW!!!

Maybe that’s a bit extreme 😉 But you get my point.

What do you think? Is yummy medicine a good thing? Comment below and let me know.
(Please remember to keep comments civil and polite – I’m sure this is going to be a hot button topic!)


Filed Under: Healthy Living

Apple Sauce Recipe & Apple Core Tip

October 10, 2013 by Marla Leave a Comment

I recently learned that apples have more pesticide residue than any other fruit or vegetable. Really?? That’s not the one I would have picked. They’re at the top of the Dirty Dozen list for 2012. According to the Environmental Working Group, who puts out the list, picking 4 servings of fruits and veggies from the Dirty Dozen would result in consuming an average of 14 different pesticides a day! (from their Android app, Dirty Dozen. I’m sure there’s an iPhone app too)

So a couple weeks ago when I saw organic Jonathan apples on sale at Natural Grocers for only about $1.30/lb I bought an entire case, about 30lbs. Buying them by the case brought them down to about $1/lb!

 
So what in the world do you do with 30lbs of apples??

I sliced most of them and dried them in my Nesco Dehydrator  (affiliate link) to make apple chips. YUMMY!! I could have added some cinnamon for a really special treat, but I wasn’t sure how I was going to use them so I left them plain. I sliced them 1/4″ thick on my mandolin slicer and dried them for about 18 hrs at 115 degrees. Time varies depending on ambient humidity.

So how do you prepare 30lbs of apples and retain all your appendages (not to mention your sanity)?

Probably everyone has an apple corer like this one.  They sure make slicing apples quick!

But have you ever stopped to think about how much waste it leaves in the core?

OK, I know. I’m strange. But while certainly worth it, buying organic is more expensive than buying conventional.  So I for one want to make sure I get as much out of my produce as I can!

I came across an excellent tip in one of the dehydrating groups I follow on Facebook. That particular group has closed but here’s the one that took its place: Dehydrating Tips and Recipes. I’m sorry I don’t remember who posted the tip or I would certainly give credit here!


Look how much less waste there is
by using the melon baller!

Here’s your tip:

Rather than using an apple corer and lose so much good apple, Cut the apple in half and use a melon baller (affiliate link) to remove the core. GENIUS!

Think about it! The core is only about the size of a grape, but with an apple corer you’re throwing away a piece about the size of your thumb. Multiply that by 30 lbs of apples and that’s a lot of waste!

Sure it wasn’t as fast as the corer, but that’s fine by me. I got more apple slices and sauce that way!

Apple Sauce – the easy way!

My husband has very fond memories of his grandmother making apple sauce. I really wanted to find a good recipe. I SOOO wanted to hear him say “That’s tastes just like MawMaw’s!”

My first attempt didn’t elicit quite that response. I found a recipe somewhere online but I didn’t have the apples they recommended. I just used what I had on hand. Yup. Granny Smith (you already know where this is going….).

I followed the recipe to a tee and proudly served it to my husband along with his beloved hamburger. We won’t revisit the dinnertime conversation here….let’s just say it wasn’t what I craved.

So I tried again. This time with different apples. I don’t remember which ones, unfortunately, but they were red NOT green.

SUCCESS! He loved it! And I’ve been making it ever since.

Before learning the melon baller tip I would use the apple corer to slice the apples. I would put them in my slow cooker and drizzle some lemon juice over them to help keep them from browning. I left the apples on low for several hours until soft then used my immersion blender to puree them.

Since learning the melon baller trick, all I do is slice the apples in half, remove the core, pull out the stem and take a tiny bit out for the blossom end. I put them in the slow cooker without slicing further.  I found this leaves less surface area for the apple to brown and they retain their color without lemon juice. Of course, I could add some just to give the apple sauce a little twang (I *am* Texan, ya know!). Keeping them in halves might make it just a little harder to get the immersion blender started good, but its not bad. You could also do them in a food processor or blender.

Print
Apple Sauce
Store bought apple sauce just can't compete with homemade apple sauce full of fresh ingredients and made with love!
Course: Side Dish
Cuisine: Vegetarian
Author: Marla Evans @ ReclaimedHealth.com
Ingredients
  • 5 qt Slow Cooker*
  • 2-3 lbs of sweet apples** I like Jonathan, Gala or Pink Lady
  • 2-3 Tbsp Lemon Juice optional if leaving apples in halves
  • Cinnamon Nutmeg or Apple Pie Spice to taste if you want to flavor your apple sauce (you can also add it after the sauce is done)
Instructions
  1. Slice and core apples using the melon baller trick. If you're using organic apples feel free to leave the peels on for more fiber, nutrients, and a little color (the Jonathan apple skins make a PINK applesauce!). If using conventional apples I would probably peel them to avoid at least some of the pesticides.
  2. Put the apples in a 5 quart slow cooker. Drizzle with lemon juice and spices if desired. Leave them to cook for 3-4 hours on low or until they're tender. You might need to put a clothes pin on your nose so the yummy aroma won't tempt you to eat them before the sauce is done!!
  3. * If you don't have a slow cooker, or for larger batches, you could probably cook the apples in the oven. I haven't tried it, but I would imagine they'd do well as long as they're tightly covered so they don't dry out. I'd probably start with 350 degrees and go from there, but that's just a guess.
  4. ** Try using pears for pear sauce! Or you could even combine apples and pears if you'd like.
  5. Once tender, allow to cool at least a little. Immersion blenders tend to splatter if you aren't careful and you don't want to burn yourself!
  6. Blend with the immersion blender, food processor or regular blender until it reaches your desired consistency. We like ours chunky.
  7. Store in mason jars or other air tight container. I like mason jars because I can use my FoodSaver vacuum sealer to remove the air and the apple sauce lasts longer in the fridge.
  8. Store in the fridge. Keeps for a week or 2 (assuming you can keep your family out of it that long!).


Filed Under: Recipes

Finally! An Excellent Raw Marinara Sauce!

September 29, 2013 by Marla Leave a Comment

For several weeks I’ve been scouring the internet looking for recipes to use in my upcoming class, “Vegetables Even Your Husband Will Eat.” I knew one of the dishes I wanted to show people was raw zucchini spaghetti noodles, so I wanted a good sauce to use on them. I’ve tried several raw recipes and just found them too much like fresh tomato juice – yummy to be sure, but not marinara sauce.

I went to Amazon to see if I could find some raw cookbooks (or should that be UNcookbook?) and found Amber Shea Crawley’s Practically Raw: Flexible Raw Recipes Anyone Can Make. It had really good reviews so I decided to order it. And I’m so glad I did!!

On page 136 I found her “Spaghetti alla Marinara.” OH MY GOSH!! The sundried tomatoes were the missing link! They add such a wonderful depth of flavor to the sauce. All the other sauces I’ve tried were just too thin tasting. I had my 7 year old granddaughter help me make the sauce and she asked for seconds! Quite a compliment from such a finicky, picky, selective eater!

Being the tweaker that I am, I couldn’t just make the recipe as published. OH NO! That would be too easy! So here’s my version of Spaghetti Alla Marinara:

Marla’s Version of Spaghetti Alla Marinara

FOR THE SAUCE:

1 cup sundried tomatoes, soaked for 30 minutes and water reserved
1 large or 2 small pitted dates soaked with the sundried tomatoes (I used one large medjool date)
2 medium ripe tomatoes, cored, seeded and chopped
(I had a package of cherry tomatoes that needed to be used up so I used them instead. I just sliced them in half and added to the blender)
1 small clove garlic, peeled
2 tablespoons of nutritional yeast (I only used 1T because I’m not a big fan)
1 tablespoon olive oil
2 teaspoons dried oregano
1 teaspoon balsamic vinegar
1/2 teaspoon sea salt
1/2 to 3/4 cup soaking water, as needed


FOR THE SPAGHETTI NOODLES:

4 medium zucchini, peeled, spiralized

DIRECTIONS:

Soak the sundried tomatoes and date(s) in enough water to cover them. Set aside while you prepare your zucchini. Cold water is fine, but warm water will soften them faster. Soaking not only softens the tomatoes and dates so they blend easier (and don’t burnout your food processor/blender), but it creates a wonderfully flavorful liquid that enhances the sauce.

Sometimes zucchini peels can be bitter so I recommend peeling them if serving to children (or husbands!). Spiralize your zucchini to make spaghetti noodles.

If you don’t have a spiral slicer you can use a standard vegetable peeler to make fettuccine noodles. Just peel the zucchini like you normally would. After you remove all the green skin, just keep going. Turn the zucchini frequently to keep the noodles from getting too wide. Stop when you get to the seeds in the center. That part doesn’t make very good noodles. Snack on that part as you prepare dinner or use it to sample your sauce as you make it!

Optional:Sprinkle the noodles with a generous pinch or two of salt and toss to coat. This will draw some of the moisture out of the noodles and make them more “al dente” and a little less zucchini-ish. Allow to sit for 10-15 minutes or more then drain off the water before serving. If you like, you can rinse them to remove the salt then dry them in a salad spinner. I just adjust the amount of salt in the sauce.

Combine all sauce ingredients including the 1/2 cup soaking water in a high-speed blender and blend to combine. Add more water, 2 tablespoons at a time, as needed to help blend smoothly. The sauce should be thick.

After  blending the sauce on the Whole Foods setting of my blendtec blender to make it smooth, I blended again using the Soup setting to gently heat the sauce.

In a large bowl, toss the zucchini noodles with the marinara sauce. Serve immediately.

If you won’t be eating all the spaghetti at once, refrigerate the noodles and sauce separately. If you mix them together the zucchini will release its juice and thin the sauce.

I found the sauce to be a little too salty. I don’t know if I accidentally used 1/2 TABLESPOON of salt instead of 1/2 teaspoon (not that *I’d* ever do anything like that!) or if it just needs adjusting. To salvage the sauce I added a little turbinado sugar (a minimally processed sugar) since sweet balances salty. Worked perfectly!  Next time I’ll start with 1/4 teaspoon salt and add from there.

If you have all your ingredients at room temperature when you start, blending will warm the sauce, especially if you have a high speed blender. Use the Soup setting on a Blendtec, or blend for 90 seconds to two minutes. My zucchini were fresh out of the refrigerator so even though I warmed my sauce on the Soup setting, the noodles quickly cooled it. I wanted my spaghetti warmer, but didn’t want to cook it. I wanted to preserve all the raw goodness, like enzymes, that can be destroyed by heat. So I put both the noodles and the sauce in the oven. I warmed the oven to just over 100 degrees then turned it off. I left the noodles and sauce in there for 20-30 minutes to warm up. You could do this in a dehydrator if you have one. You can also do this to warm up left overs. Just warm the noodles and sauce separately because the noodles will release juice as they warm. Be careful not to heat them too much or they’ll get soggy.

Print
Finally! An Excellent Raw Marinara Sauce!
The sundried tomatoes add such a great depth of flavor to this sauce
Course: Dinner
Cuisine: Raw
Author: Marla Evans @ ReclaimedHealth.com
Ingredients
  • FOR THE SAUCE:
  • 1 cup sundried tomatoes soaked for 30 minutes and water reserved
  • 1 large or 2 small pitted dates soaked with the sundried tomatoes I used one large medjool date
  • 2 medium ripe tomatoes cored, seeded and chopped
  • I had a package of cherry tomatoes that needed to be used up so I used them instead. I just sliced them in half and added to the blender
  • 1 small clove garlic peeled
  • 2 tablespoons of nutritional yeast I only used 1T because I'm not a big fan
  • 1 tablespoon olive oil
  • 2 teaspoons dried oregano
  • 1 teaspoon balsamic vinegar
  • 1/2 teaspoon sea salt
  • 1/2 to 3/4 cup soaking water as needed
  • FOR THE SPAGHETTI NOODLES:
  • 4 medium zucchini peeled, spiralized
Instructions
  1. Soak the sundried tomatoes and date(s) in enough water to cover them. Set aside while you prepare your zucchini. Cold water is fine, but warm water will soften them faster. Soaking not only softens the tomatoes and dates so they blend easier (and don't burnout your food processor/blender), but it creates a wonderfully flavorful liquid that enhances the sauce.
  2. Sometimes zucchini peels can be bitter so I recommend peeling them if serving to children (or husbands!). Spiralize your zucchini to make spaghetti noodles.
  3. If you don't have a spiral slicer you can use a standard vegetable peeler to make fettuccine noodles. Just peel the zucchini like you normally would. After you remove all the green skin, just keep going. Turn the zucchini frequently to keep the noodles from getting too wide. Stop when you get to the seeds in the center. That part doesn't make very good noodles. Snack on that part as you prepare dinner or use it to sample your sauce as you make it!
  4. Optional:Sprinkle the noodles with a generous pinch or two of salt and toss to coat. This will draw some of the moisture out of the noodles and make them more "al dente" and a little less zucchini-ish. Allow to sit for 10-15 minutes or more then drain off the water before serving. If you like, you can rinse them to remove the salt then dry them in a salad spinner. I just adjust the amount of salt in the sauce.
  5. Combine all sauce ingredients including the 1/2 cup soaking water in a high-speed blender and blend to combine. Add more water, 2 tablespoons at a time, as needed to help blend smoothly. The sauce should be thick.
  6. After blending the sauce on the Whole Foods setting of my blendtec blender to make it smooth, I blended again using the Soup setting to gently heat the sauce.
  7. In a large bowl, toss the zucchini noodles with the marinara sauce. Serve immediately.
  8. If you won't be eating all the spaghetti at once, refrigerate the noodles and sauce separately. If you mix them together the zucchini will release its juice and thin the sauce.
  9. I found the sauce to be a little too salty. I don't know if I accidentally used 1/2 TABLESPOON of salt instead of 1/2 teaspoon (not that *I'd* ever do anything like that!) or if it just needs adjusting. To salvage the sauce I added a little turbinado sugar (a minimally processed sugar) since sweet balances salty. Worked perfectly! Next time I'll start with 1/4 teaspoon salt and add from there.
  10. If you have all your ingredients at room temperature when you start, blending will warm the sauce, especially if you have a high speed blender. Use the Soup setting on a Blendtec, or blend for 90 seconds to two minutes. My zucchini were fresh out of the refrigerator so even though I warmed my sauce on the Soup setting, the noodles quickly cooled it. I wanted my spaghetti warmer, but didn't want to cook it. I wanted to preserve all the raw goodness, like enzymes, that can be destroyed by heat. So I put both the noodles and the sauce in the oven. I warmed the oven to just over 100 degrees then turned it off. I left the noodles and sauce in there for 20-30 minutes to warm up. You could do this in a dehydrator if you have one. You can also do this to warm up left overs. Just warm the noodles and sauce separately because the noodles will release juice as they warm. Be careful not to heat them too much or they'll get soggy.


Filed Under: Recipes

Spring in the Texas Panhandle & Chocolate Mint Smoothie

May 20, 2013 by Marla Leave a Comment

It was a little questionable at first, but it does appear Spring has finally arrived in the Texas Panhandle! It’s been quite a ride this year hasn’t it? Warm days followed by deep freezes, crazy 70 degree temperature swings, and of course, our beloved wind!

But now that Mother’s Day has passed, it looks like it’s finally safe to get outside and PLANT SOMETHING!

I worked up the nerve to plant a garden this year! I planted one zucchini plant, one cucumber plant, one melon plant, a blackberry bush, some strawberries and a few grape tomato plants (just for the grandkids! They LOVE those things!).

I didn’t do anything fancy. The veggie plants are tucked in a bare spot in the shrub bed. The blackberry bush is just plopped in the big middle of the grass next to the house. He’s kinda lonely over there all by himself, but I’m sure he’ll appreciate all the room as he grows up!

I purchased several herbs late last summer. I just kept them in pots on the front porch and over-wintered them in my laundry room. I got them planted this past weekend too. BOY! Are they ever excited to be able to stretch their roots! I planted a rosemary bush, parsley, basil, orange mint, and CHOCOLATE MINT!!! (that’s some good stuff in smoothies, ya’ll!)
Speaking of smoothies, how about a nice Chocolate Mint Smoothie??
Here ya go!

Print
Spring in the Texas Panhandle & Chocolate Mint Smoothie
Course: Snack
Cuisine: Traditional Foods
Author: Marla Evans @ ReclaimedHealth.com
Ingredients
  • 1/2 cup kefir plain or vanilla
  • 1 Tbsp coco powder
  • 1 tsp raw honey or a few drops of liquid stevia if you need to watch your blood sugar
  • 1 tsp coconut oil for healthy fat and extra energy
  • 1 handful fresh spinach cuz that goes in every smoothie! (you could use chard, kale, or your favorite greens)
  • 5-10 fresh mint leaves It depends on their size and how minty you like it. Add a couple to start and work from there. You can also use a drop or 2 of peppermint oil.
  • Water and ice as needed to thin smoothie to desired consistency
Instructions
  1. Add all ingredients to your blender and whirl away! SOO yummy as a snack on a warm spring afternoon! This also makes FABULOUS popsicles for the kids!

Filed Under: gardening, Recipes

  • « Previous Page
  • 1
  • 2
  • Email
  • Facebook
  • Instagram
  • LinkedIn
  • Pinterest

Upcoming Events

No Events Found

Purchase products through our Fullscript virtual dispensary.

MELT with Marla

What is The MELT Method? Suffering from low back, neck or joint pain, chronic headaches, fatigue, or poor flexibility? MELT can … Read More

What’s New on the Blog

Vampire Slayer Pizza - AIP & Paleo Friendly

Vampire Slayer Pizza – AIP & Paleo Friendly

You probably already guessed that this pizza is loaded with garlic, huh? I could have called it “Garlic Chicken Pizza” but that’s not nearly as much fun!Benefits of GarlicGarlic is a member of the … Read More

Reclaimed Health

Reclaim the health you were meant to enjoy!

Marla Evans
marla@reclaimedhealth.com
806-553-0585

  • Email
  • Facebook
  • Google+
  • Instagram
  • LinkedIn
  • Pinterest

Disclaimers & Legal

© 2023 · Reclaimed Health · Created by AVS Design Studio