Reclaimed Health

Reclaim the Health You Were Meant to Enjoy

  • About Marla
    • Speaking
    • Events
  • Work With Me
    • Schedule a Consult
    • My Food Philosophy
    • What Is Functional Nutrition?
    • The MELT Method: Feel Better Now!
    • Classes
  • Contact
  • Appointments
  • Blog
  • Newsletter Subscribe
  • Resources
    • Order Supplements

Vampire Slayer Pizza – AIP & Paleo Friendly

April 20, 2020 by Marla Leave a Comment

Vampire Slayer Pizza Header

You probably already guessed that this pizza is loaded with garlic, huh? I could have called it “Garlic Chicken Pizza” but that’s not nearly as much fun!

Benefits of Garlic

Garlic is a member of the onion family and has potent medicinal properties.

Garlic is known to help reduce blood pressure, improve cholesterol levels and support the body’s protective mechanisms by preventing oxidative damage.

Traditional cultures have known about garlic’s immune-boosting properties for centuries. It’s a magnificent herb to include in your diet, especially during cold & flu season.

The compound allicin is responsible for these benefits but unless you prepare your garlic properly you lose the benefits!

How Allicin is Formed

Allicin is made of two compounds: a protein fragment called alliin and a heat-sensitive enzyme called alliinase. These compounds are stored in separate compartments within the garlic cloves. These compounds don’t combine and form allicin until the garlic clove is chopped, sliced or crushed.

Most of us just crush or chop our fresh garlic then toss it in the pot. But doing that prevents the formation of allicin.

You see, heat destroys the enzyme alliinase. Without this enzyme, alliin can’t become allicin (I know….all these names are so similar!) so you lose all the beautiful health-boosting benefits of garlic! (source: Eating On The Wild Side by Jo Robinson)

How to Properly Prepare Garlic

So does this mean you can only eat garlic raw? Not at all! You simply need to protect the enzyme alliinase long enough for it to do its work with alliin. This only takes about 10 minutes.

To maximize the benefits of garlic, simply cut, slice or crush it then allow it to rest for about 10 minutes away from heat.

If you really want to get every last bit of goodness out of your garlic, the best thing to do is Press then Rest. Use a garlic press to crush the garlic. This breaks open the most cells in the garlic clove, releasing the alliin and alliinase. Allow it to rest for 10 minutes before adding to your recipe. Not only does crushing your garlic release its full healing potential, but it also helps infuse its lovely flavor evenly through your dish. Nice!

Properly Prepare Garlic

Eating Raw Garlic

So do you need to allow garlic to rest when using it in raw dishes? Nope.

Remember, it’s heat that destroys the enzyme in garlic and that’s what prevents the formation of allicin. When you eat garlic raw the enzyme remains intact. So you can prepare and immediately eat your raw garlic dishes.

Immune-Boosting Vampire Slayer Pizza

AIP & Paleo Friendly

Vampire Slayer Pizza

This dish is based on a recipe in The Healing Kitchen by Alaena Haber and Sarah Ballantyne. I highly recommend this cookbook! Every recipe I’ve tried has been delicious.

I use simple homemade cassava tortillas as my crust. I make them in huge batches and keep in the freezer. When I want pizza I simply toast a tortilla in my air fryer for a few minutes until its crispy. Then I add my toppings and toast again to heat. But there are lots of other AIP flatbread and pizza crusts on the internet if you’d like something a little more traditional.

Ingredients

Sauce:

  • 1/2 cup extra-virgin olive oil
  • 1/2 cup full-fat coconut milk (the kind in a can not a carton)
  • 1 – 4 Tablespoons garlic cloves, peeled and crushed
  • 1/2 teaspoon Real Salt

Toppings:

  • 2 chicken breasts cut into 1” pieces
  • 10 ounce frozen chopped spinach or other green. You can also use fresh if you prefer
  • 8 oz mushrooms, sliced
  • Salt and onion powder to taste
  • Nutritional yeast to taste (can also use cheese if you eat dairy, but not AIP compliant)

Directions

Prepare your sauce:

Using the full 4 Tbsp of chopped garlic results in a VERY STRONG garlic flavor. Hence the name, Vampire Slayer. I suggest starting with 1 or 2 Tbsp of crushed garlic and see what you think. You can always add more if you like.

If you make it too strong, remember, “The solution to pollution is dilution.” Simply dilute the strong garlic flavor by adding more olive oil and coconut milk.

Place all sauce ingredients in the blender and blend until smooth.

NOTE: This sauce is also excellent when used on roasted veggies or in a salad dressing.

Prepare your topping:

Heat a large skillet over medium heat.

Add enough olive, avocado or coconut oil to coat the bottom of the pan and allow the fat to get hot. Add the chicken to the pan and sprinkle with a little salt and onion powder.

Stir frequently to brown the chicken on all sides. Be careful to not overcook.

Remove the mostly-cooked chicken from the pan and set aside.

Add the greens and mushrooms to the pan and cook until tender.

Put the veggies in a sieve or kitchen towel and squeeze out excess moisture (this keeps the pizza crust from getting soggy).

Add the veggies to the chicken and stir to combine.

Top your pizza crust with the chicken mixture, drizzle with some of the garlic sauce (that's drizzle not drench!) and sprinkle with nutritional yeast (adds a cheese-like flavor). You could also use cheese if your body approves of dairy.

Toast in the oven or air fryer on about 350 until hot.

Enjoy the immune-boosting benefits!


Let me know what you think of this recipe after you try it. Leave me a comment below.

Filed Under: Recipes Tagged With: Diet: AIP, Diet: Paleo

Homemade Tortillas – Paleo & AIP Compliant

April 20, 2020 by Marla 1 Comment

Homemade Tortillas Header

Oh, how I miss the ooey-gooey yumminess of flour tortillas. I especially miss breakfast burritos. But my body simply does not approve of grains so tortillas have been off the table for far too long.

Then I discovered CASSAVA!

Have you heard of it? Cassava is the root of the yuca plant (not to be confused with the yucca plant of North America) and is commonly eaten in Latin America and Asia. It’s a starchy root that can be fried up like potatoes or dried and ground into flour. And it’s MAGIC!

I’ve since seen cassava tortillas in the store but they’re expensive! And the ones I’ve found have extra ingredients like chia seeds that, while healthy and an excellent source of fiber and omega-3 fats, are not compliant with the elimination phase of the AIP diet.

So I got to thinking…how hard can tortillas be to make? I mean, they were a staple in homes for thousands of years so they can’t be that hard right? RIGHT!

Tortillas are super simple to make! If you’re Paleo or AIP you can use cassava flour. If your body approves of grains you can use traditional flours like wheat. Either way, there are only 4 ingredients involved and the technique is pretty much foolproof.

Homemade Tortillas

Equipment needed to make AIP tortillas
Equipment

Equipment Needed

  • Mixing bowl
  • Measuring cups & spoons
  • Pastry knife (recommended) or a simple fork will do
  • Unbleached Parchment Paper
  • Tortilla press (recommended), rolling pin or even a large round can
  • Skillet or griddle
  • Cooling Rack
Ingredients for AIP Tortillas
Ingredients

Ingredients

  • 1 Cup Cassava Flour (alternative flours discussed below)
  • 1/2 tsp Real Salt or Himalayan salt
  • 3 Tbsp Olive Oil or Avocado oil
  • 1/2 Cup Filtered Water, hot, plus a little extra

Directions

Make Your Dough

Whisk together your flour of choice along with the salt.

Add the oil and work it into the flour using a pastry knife or a fork. You want the mixture to be uniform, like sand. If you have some larger lumps and some smaller ones, continue mixing until all the lumps are the same size and the mixture appears sandy.

Very lumpy! Keep mixing
Almost There
Almost There
Just about right
Just about right
‹
›
Work the oil into the flour until it’s a sandy texture with small, uniform lumps

Add the hot water and mix until a soft dough forms. Turn it out onto the counter and knead a few times to ensure the dough is well mixed. I use a silicone baking sheet or you can use parchment paper to keep your counter clean.

NOTE: If you live in a humid environment you may not need all the water. If you live in a dryer climate you may need to add a little extra water. You’re looking for a dough that is soft and pliable and does not crack as you kneed and stretch it.

If your dough is too dry (cracks instead of stretches), add 1 teaspoon of water and mix well. Continue adding water 1 teaspoon at a time until the proper texture forms.

If your dough is too wet (sticks to your hands and the bowl) add a tablespoon of flour and mix it in well. Continue adding flour just a tablespoon at a time until the right consistency forms.

AIP Tortilla dough is too dry
Dough is too dry. Add more water.
AIP Tortilla dough is just right
Dough is just right! Rolls out smoothly without sticking.

Form & Cook Your Tortillas

Now for the fun part!

Preheat your skillet or griddle while you form the tortillas. Heat on medium-low heat. You won’t need any oil (using oil results in tostadas. Yummy and crisp if that’s what you want but won’t be a soft tortilla).

Divide your dough into 8 equal balls. I use a food scale similar to this one to weigh my dough then divide that by 8 so I get uniform tortillas. You don’t need to be that OCD but it does make for nicer tortillas.

Roll your dough into balls then form them into tortilla shapes either with the tortilla press or rolling pin.

Place the ball of dough between 2 pieces of parchment paper and place in the tortilla press or roll out using a rolling pin. You can even just use your hands to form the dough if you’d like a more rustic tortilla.

Stack the raw tortillas between parchment paper as you form them. This helps keep them from drying out while waiting to cook.

Divide the dough into 8 equal pieces
Place a piece of parchment paper in the tortilla press, add a ball of dough and cover with another piece of parchment paper
Gently press the dough into a tortilla
‹
›
Form your dough into tortillas

Check that your skillet or griddle is hot enough. Get a little water on your fingers and flick it onto the skillet. The water should sizzle then evaporate. If it sits there the pan isn’t hot enough. If it evaporates in a flash the pan is too hot. Remove it from the burner and allow it to cool for a few moments.

Keeping the tortilla on a sheet of parchment paper, flip it onto the hot pan. You can leave the parchment paper there for a moment or two so the tortilla doesn’t break as you try to peel the paper away (especially helpful if the dough is a tad wet).

Keep the tortilla dough on the parchment paper
Keep the tortilla on the parchment paper as you put it in the pan
Peel the parchment paper off after several seconds
Place the tortilla in the hot skillet paper side up.
Allow the tortilla to cook until bubbles start to form
You can leave the parchment paper in place for a few seconds to help it release from the dough then carefully peel it away.

Allow to cook for a minute or so on the first side. You’ll see small bubbles form. When the bubble areas are slightly brown on the first side, flip the tortilla and cook the other side. Cook until the bubble areas are just starting to brown. If you overcook you’ll end up with tostadas not tortillas. It may take a couple of tries for you to learn when to flip the tortillas. Don’t worry! With just a little practice you’ll get the hang of how long to cook them for the perfect, soft tortilla.

Bubbles have formed on the tortilla. It's ready to flip
Bubbles have formed on the tortilla. It’s time to flip!

Allow your tortillas to cool then store in an airtight container in the fridge. I find that they taste best when warmed slightly.

They also freeze very well! When freezing, I keep a piece of parchment paper between them so they don’t stick together.

Notes & Variations

I use cassava flour for my tortillas but recently I discovered tiger nut flour. It adds a sweet, nutty flavor to the tortillas that I really like. I use half cassava and half tiger nut. I find that the dough is considerably stickier than just plain cassava and the tortillas tend to tear easily when flipping so this might not be the best combination for your first attempt at making tortillas. But once you get the hang of the basic cassava tortilla I highly recommend giving this one a try!

I’ve seen AIP tortillas made with arrowroot starch too, but I don’t care much for the flavor.

Of course, if your body approves of grains you can use wheat flour, sorghum, etc.

You can turn these tortillas into pita bread by adding about 1/2 tsp baking powder to the dry ingredients. This results in a fluffier bread much like a pita. Be sure your baking powder is AIP compliant if you’re in the elimination stage.

I also use these tortillas as PIZZA CRUST! I just bake them for several minutes in my air fryer then top with pizza toppings and heat in the fryer. It results in a thin, crispy crust. Or you can make the pita bread variation and use that as a pizza crust.

Filed Under: Recipes Tagged With: Diet: AIP, Diet: Paleo

Better Than Sex Shepherd’s Pie

December 27, 2016 by Marla Leave a Comment

betterthansexshepherdpie

You’ve heard of Better Than Sex cake? Well, I think I’m going to have to call this Better Than Sex Shepherd’s Pie.

It’s THAT good!

It all started when I got adventurous in the kitchen…..

I bought a small smoker a couple months ago and soon discovered an amazing smoked chicken recipe that I’ve been making rather regularly. It was quite the hit with the grandkids at Thanksgiving! So much so that I gave the 9-year-old boy a whole smoked chicken for his birthday! One happy kid.

I made another smoked chicken for our Christmas potluck dinner. As always, I set aside the chitlins thinking maybe I’d try my hand at chitlin’ gravy even though neither my husband nor I are big gravy fans. Still, I hate wasting them.

The day after Christmas I felt like getting back in the kitchen so I decided to try making that gravy. Mind you, I’ve never made gravy before so I really wasn’t sure what to expect!

I sautéed the chitlins in a little oil. WOW! That sunk! I thought beef liver smelled bad!

But I persevered.

While they were cooking I was also warming up the leftover smoked chicken from Christmas dinner. I find it easier to get the meat off the bone when it’s warm. The chicken released a little more juice as it warmed up so I decided that smoky goodness would be nice in my gravy.

I poured the smoky chicken broth in the pan with the chitlin’s and continued cooking. I added some more chicken broth from the fridge, some onion & garlic powder, a little sage, salt & pepper and let it simmer for maybe 30 minutes.

It smelled so good!

I added 2 big spoonfuls of arrowroot powder to some cold chicken broth and allowed it to dissolve before adding it to the gravy pan. I simmered it some more to let it thicken. OH MY GOSH it turned out so good!

Now what to do with it! Like I said, neither me nor my husband are big on gravy.

That’s when I remembered the pound of hamburger in the fridge! I had planned to make Shepherd’s pie and realized this amazing gravy would be great in place of the sauce I usually make.

shepherdpie

So I cooked up about ½ an onion in a little butter, cooked the hamburger and added salt & pepper.

Since grass fed beef (any beef for that matter!) is so expensive I added a drained can of lentils to the meat. That stretches it further for only a couple dollars (much less if I had cooked them myself instead of using canned but was short on time).

Toss in a bag of frozen peas & carrots (or any veggie for that matter. Cabbage is really good) then add the gravy. Simmer for a while to let any extra water evaporate.

Transfer to a 9×13 casserole bowl and top with mashed potatoes made with a ridiculous amount of grass fed butter and a little more chicken broth. Or for a low-carb option use cauliflower “faux-tatoes” which are simply mashed potatoes using steamed cauliflower in place of mashed potatoes.

Bake at 350 until the potatoes start to brown.

OH MY GOSH!!!

Save

Save

Save

Filed Under: Main Course, Recipes

Pudding for Breakfast? Yes, Please!

October 22, 2016 by Marla Leave a Comment

chia-pudding-header


Chia Seeds?

Cha-Cha-Cha Chia?  Like those planter thingies?

Really?

Yup.

The Humble Chia Seed

We’re all familiar with those terracotta planters that you spread with chia seeds which grow into “hair.” They’re very funny. But did you know those little chia seeds are nutrition powerhouses?

Chia seeds are high in fiber, omega-3 fats, protein, vitamins and minerals:

  • Dietary fiber (11g – 42% recommended daily value)
  • Protein (4.4g – 9% RDV)
  • Omega-3 fatty acids (4915 mg)
  • Omega-6 fatty acids (1620 mg)
  • Calcium (77 mg – 18% RDV)
  • Copper (0.1 mg – 3% RDV)
  • Phosphorus (265 mg – 27% RDV)
  • Potassium (44.8 mg – 1% RDV)
  • Zinc (1.0 mg – 7% RDV) (source)

Making the switch to a grain-free or Paleo-style diet can be challenging. We miss foods like oatmeal and breakfast cereal. Grains are also used as thickeners in sauces. Thankfully we have the humble chia seed!

Recipes for chia pudding (also called chia gel) abound. A quick internet search will bring up dozens of recipes. That just goes to show how very versatile this little seed is.

The most basic recipe for chia pudding is simply 5 parts liquid to 1 part chia seeds.

So you can use 2.5 cups of full-fat coconut milk (the kind in a BPA-free can) to 1/2 cup chia seeds.   Or for a smaller batch you could use 1.25 cups of almond milk to 1/4 cup chia seeds. Or just use plain water. Chia seeds have no flavor on their own and of course neither does water so you’ll want to use a little more spices and probably a pinch of sea salt or it will be quite bland.  You can use most any liquid:  water, nut milk, coconut milk, tea, etc. You’re only limited by your imagination!

Mmmmmm……what about chai tea chia pudding with some toasted coconut? Just be sure to let the tea cool to room temperature before adding the chia seeds.

Top like you would oatmeal. You can used berries, fruit, nuts, toasted coconut, flax seeds, pumpkin seeds, etc.  Add spices like cinnamon or pumpkin pie spice, vanilla or almond extract.  How about a splash of vanilla and a little coco for a yummy chocolate pudding?

Use your imagination! Then post your creations below. I’d love to hear what you come up with!

marla


Print
Chia Gel: A Better Breakfast!
Prep Time
5 mins
Cook Time
2 hrs
Total Time
2 hrs 5 mins
 
Chia gel is high is omega-3's and fiber. It makes a satisfying breakfast in place of oatmeal. Top it with your favorite oatmeal toppings like nuts, seeds, cinnamon or honey.
Course: Breakfast
Cuisine: Vegan
Servings: 4 servings
Calories: 138 kcal
Author: Marla Evans @ ReclaimedHealth.com
Ingredients
  • 1/2 cup chia seeds
  • 1 can coconut milk 13.5 oz
  • Water to make a total of 2 1/2 cups of liquid Or use 2 1/2 cups non-dairy milk
  • Pinch of sea salt
  • Toppings of your choice
Instructions
  1. Put coconut milk, water, and salt in a jar and shake until well blended
  2. Add chia seeds and shake or stir
  3. Shake or stir frequently for the first 5 minutes or so. As the seeds begin to absorb the liquid they will swell and stick together. Shaking or stirring prevents this
  4. Allow to sit in the refrigerator for several hours or overnight. The seeds will continue to swell and form a gel.
  5. When ready to serve top with your favorite oatmeal toppings
Recipe Notes

Suggested Variations:
Strawberries, blueberries with toasted coconut
Green apple & cinnamon with pecans
Walnuts, pumpkin seeds and pumpkin pie spice
Blueberries and cardamom with pumpkin seeds
1/4 cup pumpkin puree, pumpkin pie spice, cashews
Spoonful of coco, splash of vanilla and a little liquid stevia or honey

If the tapioca texture of chia gel bothers you, put the seeds and liquid in a blender and blend until smooth. You'll end up with a pudding texture instead.

**Nutrition information for 1/4 recipe of chia gel made with water and no toppings. Other liquids and toppings will alter the nutrition content


Save

Save

Save

Save

Save

Save

Filed Under: Breakfast, Recipes, Vegan Tagged With: breakfast, chia seeds, omega-3, vegan

The World’s Ugliest Fruit Dip!

November 7, 2013 by Marla Leave a Comment

World's Ugliest Fruit Dip
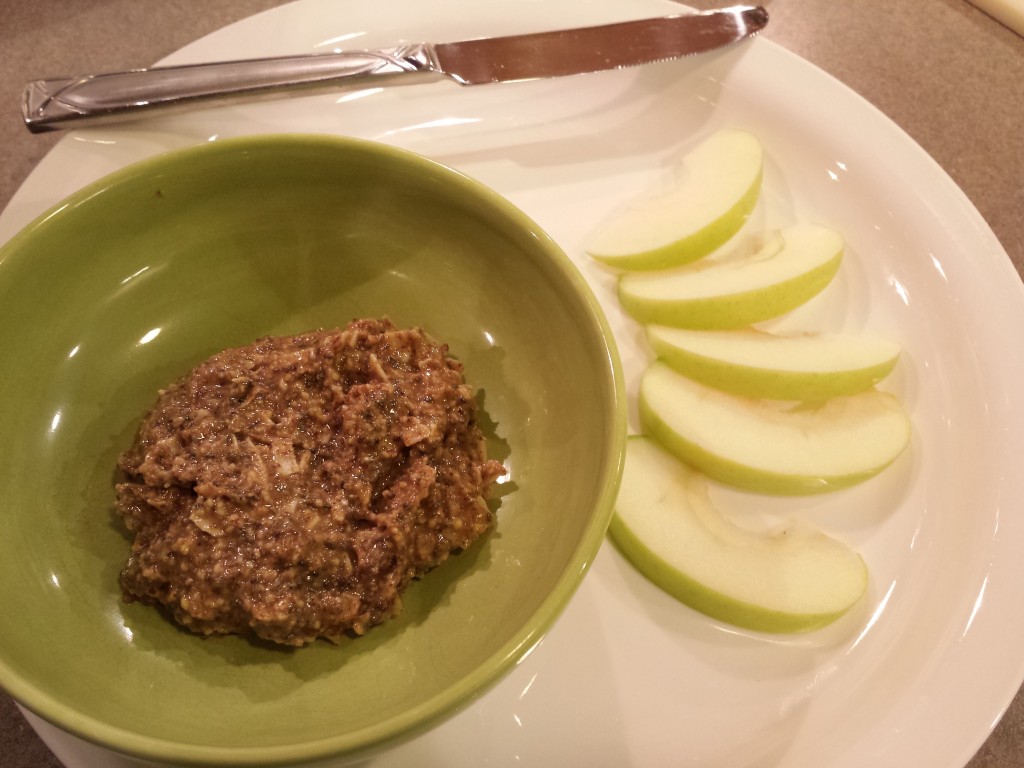
This must truly be the Ugliest Fruit Dip EVER! But it tastes so good and it’s so good for you! Yes, it’s high in fat so you don’t want to overdo it. But these are healthy fats! These are the kinds of real, whole food fats your body and brain need to function optimally.

Almond Butter & Chia Seed

This dip or spread starts with a base of almond butter, adds Chia seeds and coconut to balance the Omega-6’s in the almond butter, maple syrup (use the real stuff!) for minerals and olive oil for some more healthy fat.

Here’s how you make it, and no, I don’t measure this one. It’s too simple. Just play around with the amounts until you get a mix you like.

Try to find an almond butter without added sugar, just plain ground almonds and maybe some salt. I find fresh ground almond butter at Natural Grocers.


Ugliest Dip Apple Sandwich
Print
The World's Ugliest Fruit Dip!
Spread on slices of Granny Smith apples (low in sugar) for a VERY filling snack. That's all I had for dinner tonight and it filled me up very well. If you eat grains, this would make a good sandwich filling, or spread on toast. How about on celery or bananas? That would be tasty too!
Author: Marla Evans @ ReclaimedHealth.com
Ingredients
  • 1 Soup spoon full of unsweetened almond butter
  • Pinch of salt if your almond butter doesn't contain salt
  • Drizzle of maple syrup
  • Drizzle of olive oil
  • Big pinch of shredded coconut
  • 1 Soup spoon full of chia seeds
Instructions
  1. All amounts are approximate. Adjust to your taste. Add more or less maple syrup to your desired sweetness level. Add a little more olive oil if it's too thick. There's something about maple syrup that makes almond butter seize up and get dry and crumbly and the olive oil helps.
  2. Mix almond butter, salt, maple syrup and olive oil until well blended
  3. Add coconut and chia seeds and mix well
  4. Enjoy!


Ugliest Dip Revealed!


Filed Under: Recipes

  • 1
  • 2
  • Next Page »
  • Email
  • Facebook
  • Instagram
  • LinkedIn
  • Pinterest

Upcoming Events

No Events Found

Purchase products through our Fullscript virtual dispensary.

MELT with Marla

What is The MELT Method? Suffering from low back, neck or joint pain, chronic headaches, fatigue, or poor flexibility? MELT can … Read More

What’s New on the Blog

Vampire Slayer Pizza - AIP & Paleo Friendly

Vampire Slayer Pizza – AIP & Paleo Friendly

You probably already guessed that this pizza is loaded with garlic, huh? I could have called it “Garlic Chicken Pizza” but that’s not nearly as much fun!Benefits of GarlicGarlic is a member of the … Read More

Reclaimed Health

Reclaim the health you were meant to enjoy!

Marla Evans
marla@reclaimedhealth.com
806-553-0585

  • Email
  • Facebook
  • Google+
  • Instagram
  • LinkedIn
  • Pinterest

Disclaimers & Legal

© 2023 · Reclaimed Health · Created by AVS Design Studio