Reclaimed Health

Reclaim the Health You Were Meant to Enjoy

  • About Marla
    • Speaking
    • Events
  • Work With Me
    • Schedule a Consult
    • My Food Philosophy
    • What Is Functional Nutrition?
    • The MELT Method: Feel Better Now!
    • Classes
  • Contact
  • Appointments
  • Blog
  • Newsletter Subscribe
  • Resources
    • Order Supplements

Apple Sauce Recipe & Apple Core Tip

October 10, 2013 by Marla Leave a Comment

I recently learned that apples have more pesticide residue than any other fruit or vegetable. Really?? That’s not the one I would have picked. They’re at the top of the Dirty Dozen list for 2012. According to the Environmental Working Group, who puts out the list, picking 4 servings of fruits and veggies from the Dirty Dozen would result in consuming an average of 14 different pesticides a day! (from their Android app, Dirty Dozen. I’m sure there’s an iPhone app too)

So a couple weeks ago when I saw organic Jonathan apples on sale at Natural Grocers for only about $1.30/lb I bought an entire case, about 30lbs. Buying them by the case brought them down to about $1/lb!

 
So what in the world do you do with 30lbs of apples??

I sliced most of them and dried them in my Nesco Dehydrator  (affiliate link) to make apple chips. YUMMY!! I could have added some cinnamon for a really special treat, but I wasn’t sure how I was going to use them so I left them plain. I sliced them 1/4″ thick on my mandolin slicer and dried them for about 18 hrs at 115 degrees. Time varies depending on ambient humidity.

So how do you prepare 30lbs of apples and retain all your appendages (not to mention your sanity)?

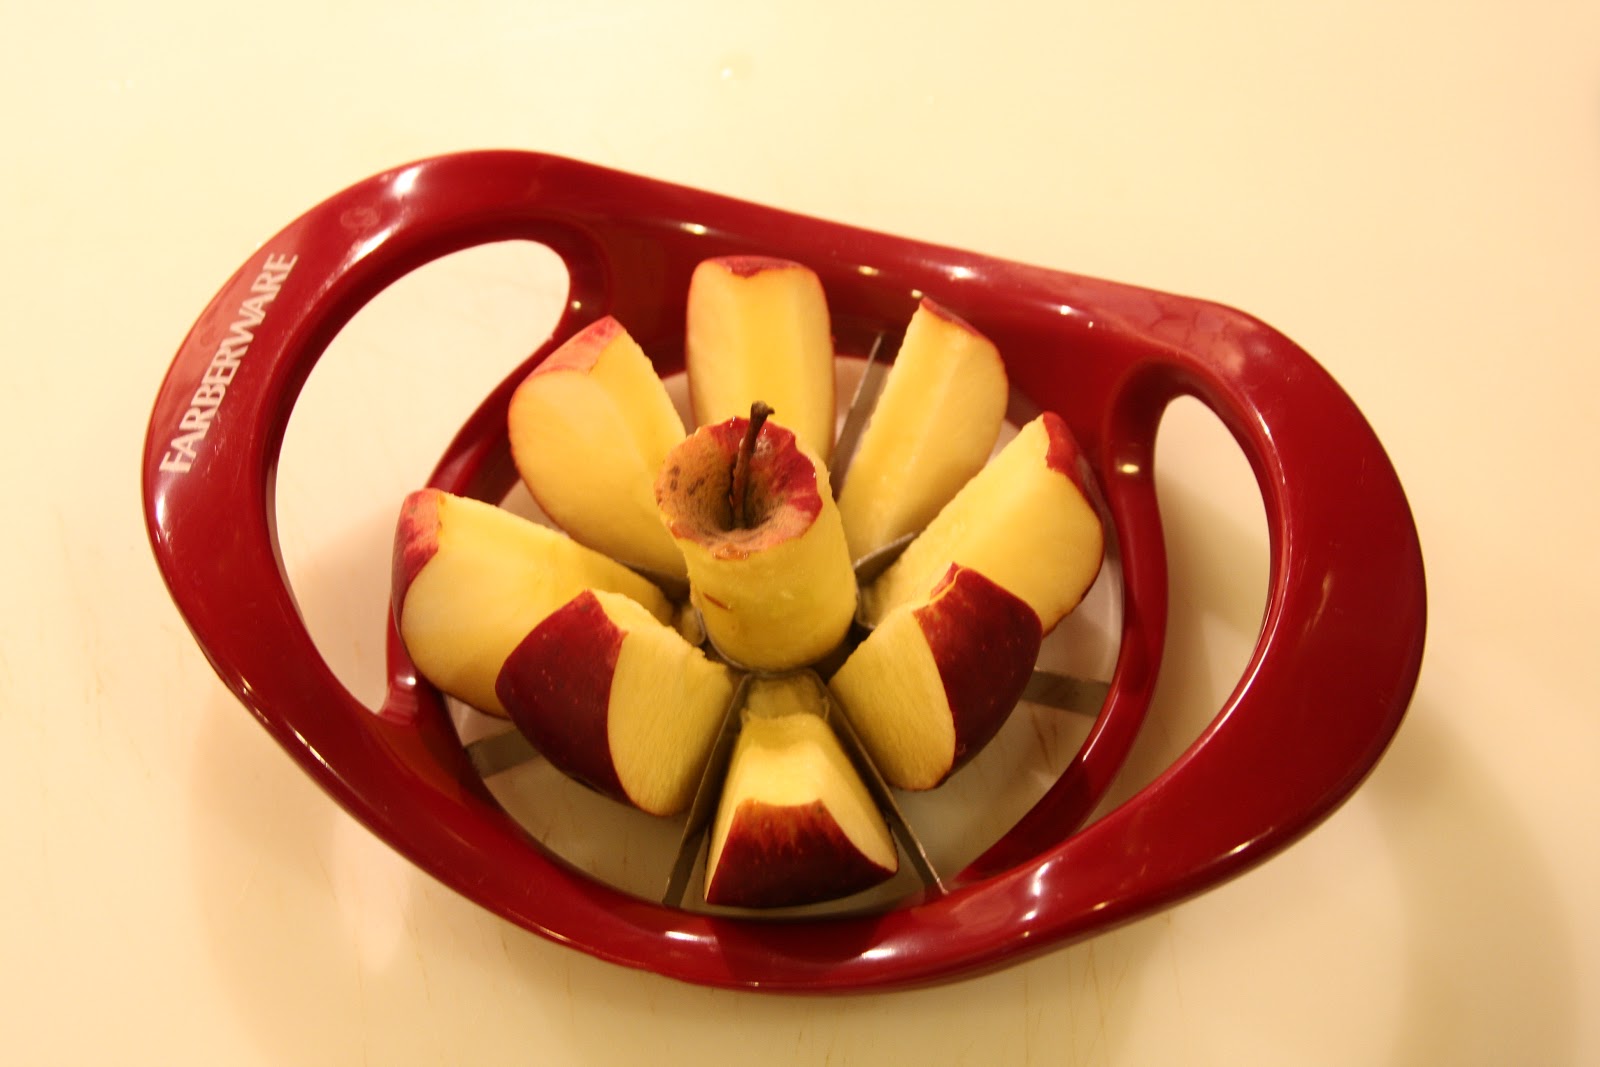
Probably everyone has an apple corer like this one.  They sure make slicing apples quick!

But have you ever stopped to think about how much waste it leaves in the core?

OK, I know. I’m strange. But while certainly worth it, buying organic is more expensive than buying conventional.  So I for one want to make sure I get as much out of my produce as I can!

I came across an excellent tip in one of the dehydrating groups I follow on Facebook. That particular group has closed but here’s the one that took its place: Dehydrating Tips and Recipes. I’m sorry I don’t remember who posted the tip or I would certainly give credit here!


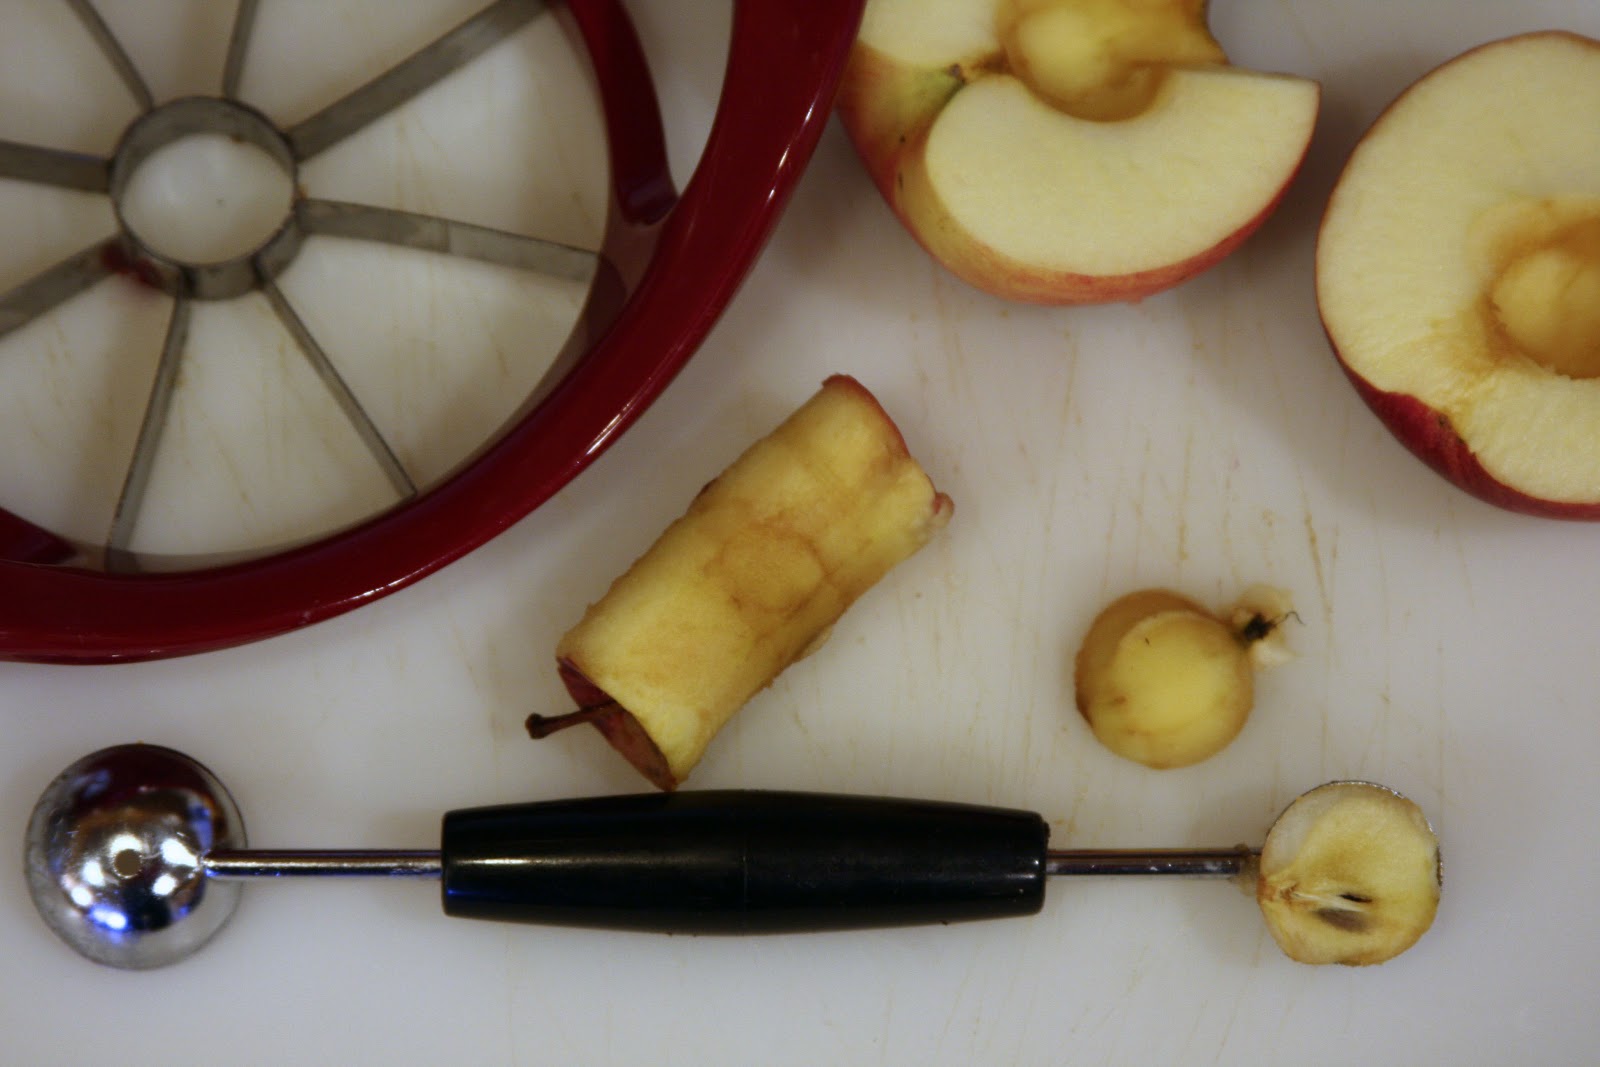
Look how much less waste there is
by using the melon baller!

Here’s your tip:

Rather than using an apple corer and lose so much good apple, Cut the apple in half and use a melon baller (affiliate link) to remove the core. GENIUS!

Think about it! The core is only about the size of a grape, but with an apple corer you’re throwing away a piece about the size of your thumb. Multiply that by 30 lbs of apples and that’s a lot of waste!

Sure it wasn’t as fast as the corer, but that’s fine by me. I got more apple slices and sauce that way!

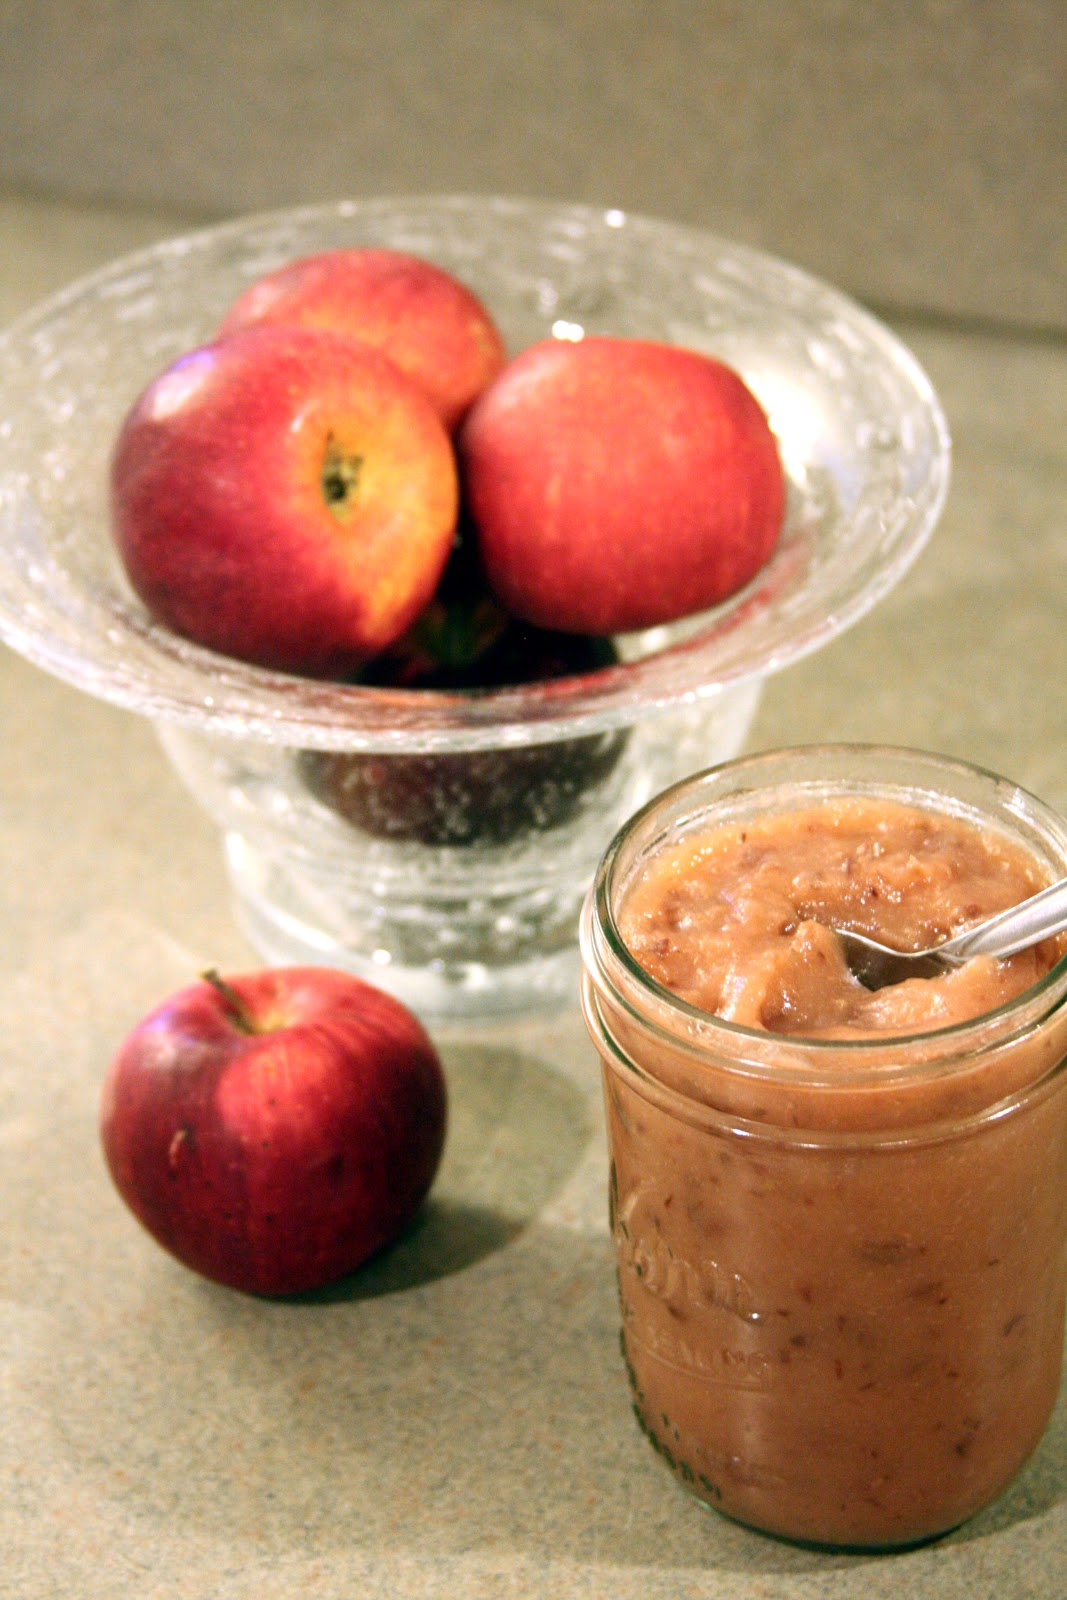
Apple Sauce – the easy way!

My husband has very fond memories of his grandmother making apple sauce. I really wanted to find a good recipe. I SOOO wanted to hear him say “That’s tastes just like MawMaw’s!”

My first attempt didn’t elicit quite that response. I found a recipe somewhere online but I didn’t have the apples they recommended. I just used what I had on hand. Yup. Granny Smith (you already know where this is going….).

I followed the recipe to a tee and proudly served it to my husband along with his beloved hamburger. We won’t revisit the dinnertime conversation here….let’s just say it wasn’t what I craved.

So I tried again. This time with different apples. I don’t remember which ones, unfortunately, but they were red NOT green.

SUCCESS! He loved it! And I’ve been making it ever since.

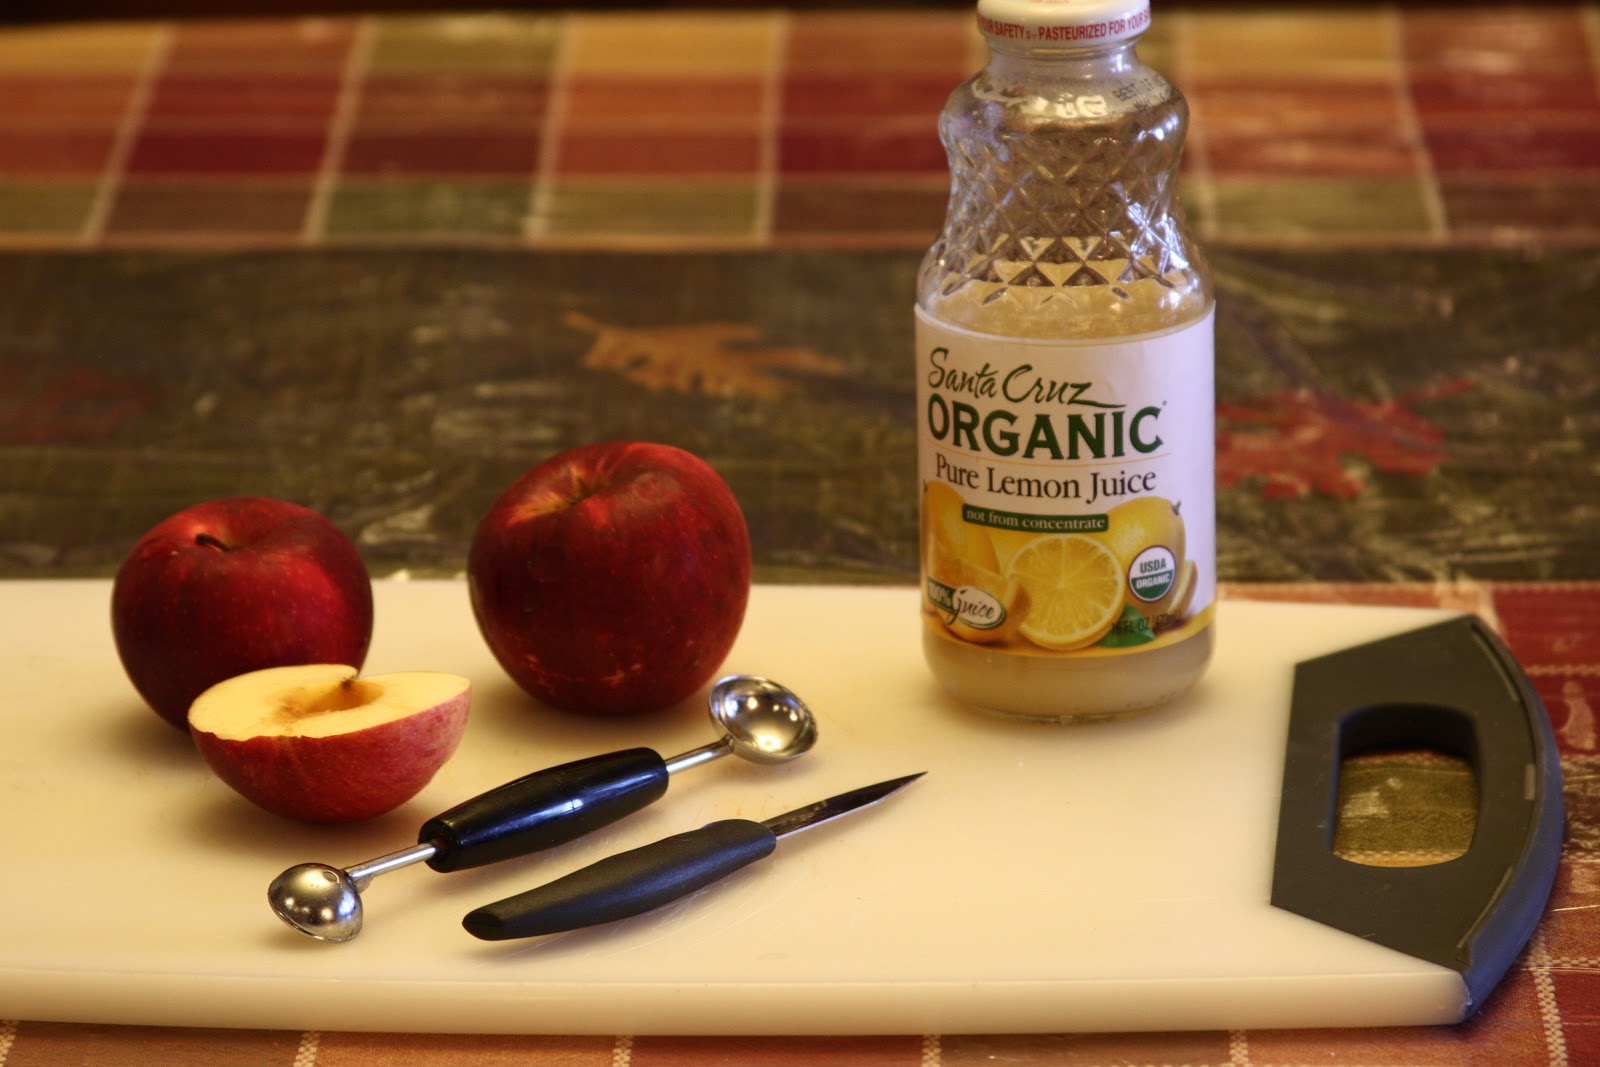
Before learning the melon baller tip I would use the apple corer to slice the apples. I would put them in my slow cooker and drizzle some lemon juice over them to help keep them from browning. I left the apples on low for several hours until soft then used my immersion blender to puree them.

Since learning the melon baller trick, all I do is slice the apples in half, remove the core, pull out the stem and take a tiny bit out for the blossom end. I put them in the slow cooker without slicing further.  I found this leaves less surface area for the apple to brown and they retain their color without lemon juice. Of course, I could add some just to give the apple sauce a little twang (I *am* Texan, ya know!). Keeping them in halves might make it just a little harder to get the immersion blender started good, but its not bad. You could also do them in a food processor or blender.

Print
Apple Sauce
Store bought apple sauce just can't compete with homemade apple sauce full of fresh ingredients and made with love!
Course: Side Dish
Cuisine: Vegetarian
Author: Marla Evans @ ReclaimedHealth.com
Ingredients
  • 5 qt Slow Cooker*
  • 2-3 lbs of sweet apples** I like Jonathan, Gala or Pink Lady
  • 2-3 Tbsp Lemon Juice optional if leaving apples in halves
  • Cinnamon Nutmeg or Apple Pie Spice to taste if you want to flavor your apple sauce (you can also add it after the sauce is done)
Instructions
  1. Slice and core apples using the melon baller trick. If you're using organic apples feel free to leave the peels on for more fiber, nutrients, and a little color (the Jonathan apple skins make a PINK applesauce!). If using conventional apples I would probably peel them to avoid at least some of the pesticides.
  2. Put the apples in a 5 quart slow cooker. Drizzle with lemon juice and spices if desired. Leave them to cook for 3-4 hours on low or until they're tender. You might need to put a clothes pin on your nose so the yummy aroma won't tempt you to eat them before the sauce is done!!
  3. * If you don't have a slow cooker, or for larger batches, you could probably cook the apples in the oven. I haven't tried it, but I would imagine they'd do well as long as they're tightly covered so they don't dry out. I'd probably start with 350 degrees and go from there, but that's just a guess.
  4. ** Try using pears for pear sauce! Or you could even combine apples and pears if you'd like.
  5. Once tender, allow to cool at least a little. Immersion blenders tend to splatter if you aren't careful and you don't want to burn yourself!
  6. Blend with the immersion blender, food processor or regular blender until it reaches your desired consistency. We like ours chunky.
  7. Store in mason jars or other air tight container. I like mason jars because I can use my FoodSaver vacuum sealer to remove the air and the apple sauce lasts longer in the fridge.
  8. Store in the fridge. Keeps for a week or 2 (assuming you can keep your family out of it that long!).


Filed Under: Recipes

Finally! An Excellent Raw Marinara Sauce!

September 29, 2013 by Marla Leave a Comment

For several weeks I’ve been scouring the internet looking for recipes to use in my upcoming class, “Vegetables Even Your Husband Will Eat.” I knew one of the dishes I wanted to show people was raw zucchini spaghetti noodles, so I wanted a good sauce to use on them. I’ve tried several raw recipes and just found them too much like fresh tomato juice – yummy to be sure, but not marinara sauce.

I went to Amazon to see if I could find some raw cookbooks (or should that be UNcookbook?) and found Amber Shea Crawley’s Practically Raw: Flexible Raw Recipes Anyone Can Make. It had really good reviews so I decided to order it. And I’m so glad I did!!

On page 136 I found her “Spaghetti alla Marinara.” OH MY GOSH!! The sundried tomatoes were the missing link! They add such a wonderful depth of flavor to the sauce. All the other sauces I’ve tried were just too thin tasting. I had my 7 year old granddaughter help me make the sauce and she asked for seconds! Quite a compliment from such a finicky, picky, selective eater!

Being the tweaker that I am, I couldn’t just make the recipe as published. OH NO! That would be too easy! So here’s my version of Spaghetti Alla Marinara:

Marla’s Version of Spaghetti Alla Marinara

FOR THE SAUCE:

1 cup sundried tomatoes, soaked for 30 minutes and water reserved
1 large or 2 small pitted dates soaked with the sundried tomatoes (I used one large medjool date)
2 medium ripe tomatoes, cored, seeded and chopped
(I had a package of cherry tomatoes that needed to be used up so I used them instead. I just sliced them in half and added to the blender)
1 small clove garlic, peeled
2 tablespoons of nutritional yeast (I only used 1T because I’m not a big fan)
1 tablespoon olive oil
2 teaspoons dried oregano
1 teaspoon balsamic vinegar
1/2 teaspoon sea salt
1/2 to 3/4 cup soaking water, as needed


FOR THE SPAGHETTI NOODLES:

4 medium zucchini, peeled, spiralized

DIRECTIONS:

Soak the sundried tomatoes and date(s) in enough water to cover them. Set aside while you prepare your zucchini. Cold water is fine, but warm water will soften them faster. Soaking not only softens the tomatoes and dates so they blend easier (and don’t burnout your food processor/blender), but it creates a wonderfully flavorful liquid that enhances the sauce.

Sometimes zucchini peels can be bitter so I recommend peeling them if serving to children (or husbands!). Spiralize your zucchini to make spaghetti noodles.

If you don’t have a spiral slicer you can use a standard vegetable peeler to make fettuccine noodles. Just peel the zucchini like you normally would. After you remove all the green skin, just keep going. Turn the zucchini frequently to keep the noodles from getting too wide. Stop when you get to the seeds in the center. That part doesn’t make very good noodles. Snack on that part as you prepare dinner or use it to sample your sauce as you make it!

Optional:Sprinkle the noodles with a generous pinch or two of salt and toss to coat. This will draw some of the moisture out of the noodles and make them more “al dente” and a little less zucchini-ish. Allow to sit for 10-15 minutes or more then drain off the water before serving. If you like, you can rinse them to remove the salt then dry them in a salad spinner. I just adjust the amount of salt in the sauce.

Combine all sauce ingredients including the 1/2 cup soaking water in a high-speed blender and blend to combine. Add more water, 2 tablespoons at a time, as needed to help blend smoothly. The sauce should be thick.

After  blending the sauce on the Whole Foods setting of my blendtec blender to make it smooth, I blended again using the Soup setting to gently heat the sauce.

In a large bowl, toss the zucchini noodles with the marinara sauce. Serve immediately.

If you won’t be eating all the spaghetti at once, refrigerate the noodles and sauce separately. If you mix them together the zucchini will release its juice and thin the sauce.

I found the sauce to be a little too salty. I don’t know if I accidentally used 1/2 TABLESPOON of salt instead of 1/2 teaspoon (not that *I’d* ever do anything like that!) or if it just needs adjusting. To salvage the sauce I added a little turbinado sugar (a minimally processed sugar) since sweet balances salty. Worked perfectly!  Next time I’ll start with 1/4 teaspoon salt and add from there.

If you have all your ingredients at room temperature when you start, blending will warm the sauce, especially if you have a high speed blender. Use the Soup setting on a Blendtec, or blend for 90 seconds to two minutes. My zucchini were fresh out of the refrigerator so even though I warmed my sauce on the Soup setting, the noodles quickly cooled it. I wanted my spaghetti warmer, but didn’t want to cook it. I wanted to preserve all the raw goodness, like enzymes, that can be destroyed by heat. So I put both the noodles and the sauce in the oven. I warmed the oven to just over 100 degrees then turned it off. I left the noodles and sauce in there for 20-30 minutes to warm up. You could do this in a dehydrator if you have one. You can also do this to warm up left overs. Just warm the noodles and sauce separately because the noodles will release juice as they warm. Be careful not to heat them too much or they’ll get soggy.

Print
Finally! An Excellent Raw Marinara Sauce!
The sundried tomatoes add such a great depth of flavor to this sauce
Course: Dinner
Cuisine: Raw
Author: Marla Evans @ ReclaimedHealth.com
Ingredients
  • FOR THE SAUCE:
  • 1 cup sundried tomatoes soaked for 30 minutes and water reserved
  • 1 large or 2 small pitted dates soaked with the sundried tomatoes I used one large medjool date
  • 2 medium ripe tomatoes cored, seeded and chopped
  • I had a package of cherry tomatoes that needed to be used up so I used them instead. I just sliced them in half and added to the blender
  • 1 small clove garlic peeled
  • 2 tablespoons of nutritional yeast I only used 1T because I'm not a big fan
  • 1 tablespoon olive oil
  • 2 teaspoons dried oregano
  • 1 teaspoon balsamic vinegar
  • 1/2 teaspoon sea salt
  • 1/2 to 3/4 cup soaking water as needed
  • FOR THE SPAGHETTI NOODLES:
  • 4 medium zucchini peeled, spiralized
Instructions
  1. Soak the sundried tomatoes and date(s) in enough water to cover them. Set aside while you prepare your zucchini. Cold water is fine, but warm water will soften them faster. Soaking not only softens the tomatoes and dates so they blend easier (and don't burnout your food processor/blender), but it creates a wonderfully flavorful liquid that enhances the sauce.
  2. Sometimes zucchini peels can be bitter so I recommend peeling them if serving to children (or husbands!). Spiralize your zucchini to make spaghetti noodles.
  3. If you don't have a spiral slicer you can use a standard vegetable peeler to make fettuccine noodles. Just peel the zucchini like you normally would. After you remove all the green skin, just keep going. Turn the zucchini frequently to keep the noodles from getting too wide. Stop when you get to the seeds in the center. That part doesn't make very good noodles. Snack on that part as you prepare dinner or use it to sample your sauce as you make it!
  4. Optional:Sprinkle the noodles with a generous pinch or two of salt and toss to coat. This will draw some of the moisture out of the noodles and make them more "al dente" and a little less zucchini-ish. Allow to sit for 10-15 minutes or more then drain off the water before serving. If you like, you can rinse them to remove the salt then dry them in a salad spinner. I just adjust the amount of salt in the sauce.
  5. Combine all sauce ingredients including the 1/2 cup soaking water in a high-speed blender and blend to combine. Add more water, 2 tablespoons at a time, as needed to help blend smoothly. The sauce should be thick.
  6. After blending the sauce on the Whole Foods setting of my blendtec blender to make it smooth, I blended again using the Soup setting to gently heat the sauce.
  7. In a large bowl, toss the zucchini noodles with the marinara sauce. Serve immediately.
  8. If you won't be eating all the spaghetti at once, refrigerate the noodles and sauce separately. If you mix them together the zucchini will release its juice and thin the sauce.
  9. I found the sauce to be a little too salty. I don't know if I accidentally used 1/2 TABLESPOON of salt instead of 1/2 teaspoon (not that *I'd* ever do anything like that!) or if it just needs adjusting. To salvage the sauce I added a little turbinado sugar (a minimally processed sugar) since sweet balances salty. Worked perfectly! Next time I'll start with 1/4 teaspoon salt and add from there.
  10. If you have all your ingredients at room temperature when you start, blending will warm the sauce, especially if you have a high speed blender. Use the Soup setting on a Blendtec, or blend for 90 seconds to two minutes. My zucchini were fresh out of the refrigerator so even though I warmed my sauce on the Soup setting, the noodles quickly cooled it. I wanted my spaghetti warmer, but didn't want to cook it. I wanted to preserve all the raw goodness, like enzymes, that can be destroyed by heat. So I put both the noodles and the sauce in the oven. I warmed the oven to just over 100 degrees then turned it off. I left the noodles and sauce in there for 20-30 minutes to warm up. You could do this in a dehydrator if you have one. You can also do this to warm up left overs. Just warm the noodles and sauce separately because the noodles will release juice as they warm. Be careful not to heat them too much or they'll get soggy.


Filed Under: Recipes

Spring in the Texas Panhandle & Chocolate Mint Smoothie

May 20, 2013 by Marla Leave a Comment

It was a little questionable at first, but it does appear Spring has finally arrived in the Texas Panhandle! It’s been quite a ride this year hasn’t it? Warm days followed by deep freezes, crazy 70 degree temperature swings, and of course, our beloved wind!

But now that Mother’s Day has passed, it looks like it’s finally safe to get outside and PLANT SOMETHING!

I worked up the nerve to plant a garden this year! I planted one zucchini plant, one cucumber plant, one melon plant, a blackberry bush, some strawberries and a few grape tomato plants (just for the grandkids! They LOVE those things!).

I didn’t do anything fancy. The veggie plants are tucked in a bare spot in the shrub bed. The blackberry bush is just plopped in the big middle of the grass next to the house. He’s kinda lonely over there all by himself, but I’m sure he’ll appreciate all the room as he grows up!

I purchased several herbs late last summer. I just kept them in pots on the front porch and over-wintered them in my laundry room. I got them planted this past weekend too. BOY! Are they ever excited to be able to stretch their roots! I planted a rosemary bush, parsley, basil, orange mint, and CHOCOLATE MINT!!! (that’s some good stuff in smoothies, ya’ll!)
Speaking of smoothies, how about a nice Chocolate Mint Smoothie??
Here ya go!

Print
Spring in the Texas Panhandle & Chocolate Mint Smoothie
Course: Snack
Cuisine: Traditional Foods
Author: Marla Evans @ ReclaimedHealth.com
Ingredients
  • 1/2 cup kefir plain or vanilla
  • 1 Tbsp coco powder
  • 1 tsp raw honey or a few drops of liquid stevia if you need to watch your blood sugar
  • 1 tsp coconut oil for healthy fat and extra energy
  • 1 handful fresh spinach cuz that goes in every smoothie! (you could use chard, kale, or your favorite greens)
  • 5-10 fresh mint leaves It depends on their size and how minty you like it. Add a couple to start and work from there. You can also use a drop or 2 of peppermint oil.
  • Water and ice as needed to thin smoothie to desired consistency
Instructions
  1. Add all ingredients to your blender and whirl away! SOO yummy as a snack on a warm spring afternoon! This also makes FABULOUS popsicles for the kids!

Filed Under: gardening, Recipes

  • « Previous Page
  • 1
  • 2
  • Email
  • Facebook
  • Instagram
  • LinkedIn
  • Pinterest

Upcoming Events

No Events Found

Purchase products through our Fullscript virtual dispensary.

MELT with Marla

What is The MELT Method? Suffering from low back, neck or joint pain, chronic headaches, fatigue, or poor flexibility? MELT can … Read More

What’s New on the Blog

Vampire Slayer Pizza - AIP & Paleo Friendly

Vampire Slayer Pizza – AIP & Paleo Friendly

You probably already guessed that this pizza is loaded with garlic, huh? I could have called it “Garlic Chicken Pizza” but that’s not nearly as much fun!Benefits of GarlicGarlic is a member of the … Read More

Reclaimed Health

Reclaim the health you were meant to enjoy!

Marla Evans
marla@reclaimedhealth.com
806-553-0585

  • Email
  • Facebook
  • Google+
  • Instagram
  • LinkedIn
  • Pinterest

Disclaimers & Legal

© 2023 · Reclaimed Health · Created by AVS Design Studio